When your home faces flooding, it can feel overwhelming, but knowing the right steps can make a difference. First, you’ll need to assess the damage while keeping safety at the forefront. It’s essential to document everything and gather protective gear. After that, turning off utilities can prevent further hazards. Each step is important, leading to effective flooded home cleanup and restoration. Let’s explore how to navigate this challenging process together and ensure your home is safe once again.
Key Takeaways
- Assess damage thoroughly, documenting with photos, and ensure safety by wearing protective gear before entering the affected areas.
- Turn off all utilities, including power, gas, and water, to prevent further hazards during cleanup.
- Remove standing water quickly using pumps or vacuums to minimize long-term damage and mold growth.
- Clear and organize materials systematically to facilitate effective cleanup and proper waste disposal.
- Inspect for mold growth, clean affected areas, and prioritize necessary repairs to restore your home safely.
Assess the Damage
As you begin to assess the damage in your flooded home, it’s essential to approach the situation methodically to ensure your safety and properly gauge the extent of the destruction.
Start by documenting everything with photos and notes, as this will be vital for your insurance claims. Look for signs of structural integrity issues, like sagging ceilings, cracks in walls, or warped floors. These indicators can help you determine whether it’s safe to enter certain areas.
Don’t rush; take your time to evaluate the damage thoroughly. Check appliances, furniture, and personal belongings, noting what can be salvaged and what needs to be discarded.
Ensure Safety Precautions
After evaluating the damage to your flooded home, the next step is to prioritize safety. Start by gathering your personal protective gear, like gloves, masks, and sturdy boots. These items will help shield you from harmful contaminants lurking in the water.
Next, make certain you have an emergency kit ready. This kit should include essentials like flashlights, batteries, a first-aid kit, and bottled water. Staying organized and prepared will help you feel more secure as you navigate through the cleanup process.
Be mindful of your surroundings; watch for any sharp objects or unstable structures that could pose a risk. If you’re unsure about any area, it’s best to err on the side of caution.
Turn Off Utilities
Before diving into the cleanup, it’s crucial to turn off your utilities to prevent further hazards.
First, locate your main power shutoff switch, usually found near your electrical panel. If water has reached this area, be cautious; never touch electrical equipment with wet hands or while standing in water.
Next, turn off your gas supply by locating the shutoff valve, typically found near the meter. If you smell gas or hear a hissing sound, leave the area immediately and call your gas company.
Finally, shut off your water supply to avoid additional flooding. The main water valve is usually found in the basement, crawl space, or outside your home.
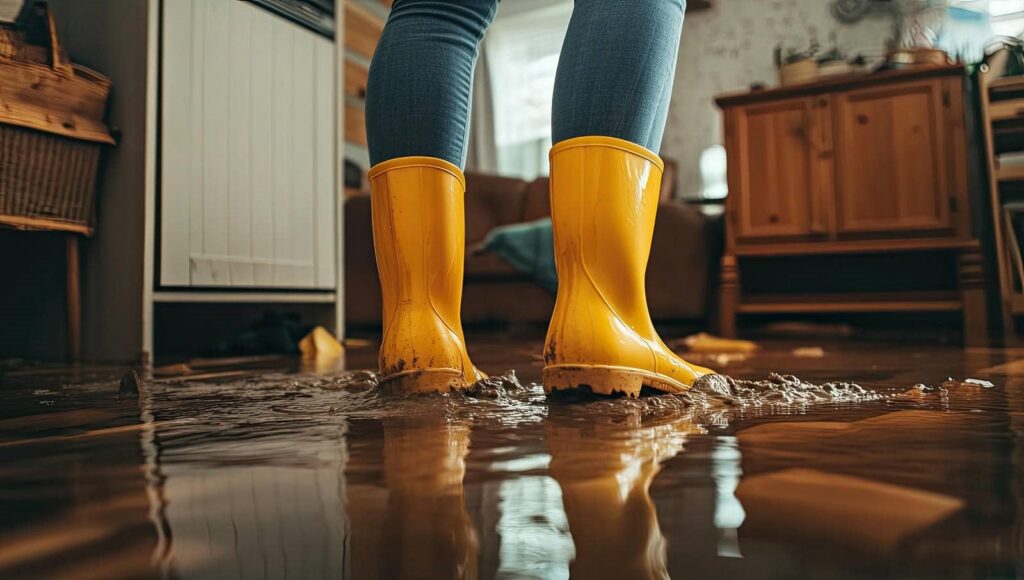
Remove Standing Water
Once you’ve verified your utilities are off, it’s time to tackle the standing water in your home.
Start by gathering your safety equipment—gloves, boots, and masks are essential to protect yourself from contaminants. If the water is deep, consider enlisting help; this can be an overwhelming task, and you don’t have to do it alone.
For effective water extraction, use a submersible pump or a wet/dry vacuum to remove as much water as possible. Move furniture and belongings to higher ground before starting; this will help prevent further damage.
Work methodically through each room, checking corners and hidden areas where water might accumulate.
As the water recedes, keep an eye on your health and safety. The sooner you address standing water, the better your chances of minimizing long-term damage and mold growth.
Dry Out the Affected Areas
Once you’ve removed the standing water, it’s essential to focus on drying out the affected areas.
Start by increasing air circulation; opening windows and using fans can make a significant difference.
Additionally, using dehumidifiers effectively will help draw out moisture, preventing further damage and mold growth.
Remove Standing Water
Act quickly to remove standing water from your flooded home, as every minute counts in preventing further damage.
Start by evaluating the situation and determining the best water extraction techniques for your needs. Use a wet/dry vacuum to tackle smaller areas, ensuring you get every last drop. For larger volumes, consider renting a submersible pump; it can greatly speed up standing water removal.
Don’t forget to wear protective gear like gloves and boots to keep yourself safe. As you work, keep in mind that your efforts protect your belongings and help maintain a sense of normalcy in your home.
Increase Air Circulation
After you’ve successfully removed the standing water, the next step is to increase air circulation to dry out the affected areas.
Start by opening windows and doors to promote airflow throughout your home. If it’s safe, use fans to enhance airflow techniques; position them to direct air into the damp spaces. Ceiling fans can also help circulate air effectively.
If you have ventilation systems in place, turn them on to assist in drying. Consider creating cross-ventilation by opening windows on opposite sides of your home.
This approach speeds up drying and helps prevent mold growth. Remember, the goal is to make your space feel fresh and inviting again, ensuring it’s a safe haven for you and your loved ones.
Use Dehumidifiers Effectively
While increasing air circulation is essential, using dehumidifiers effectively can markedly accelerate the drying process in your flooded home.
To enhance moisture control, follow these steps:
Select the Right Size: Choose a dehumidifier that matches the size of your affected area.
Adjust Dehumidifier Settings: Set the humidity level to around 30-60% for peak moisture control.
Position Strategically: Place the dehumidifier in the center of the flooded area to allow for maximum airflow.
Monitor Regularly: Check the water collection tank and empty it frequently to maintain efficiency.
Clean and Disinfect
Start by gathering your cleaning supplies, as thorough cleaning and disinfecting are essential after a flood.
You’ll need gloves, masks, buckets, sponges, and a mix of soap and water for initial cleaning.
Begin by removing any surface dirt and debris. Then, move on to disinfecting techniques that can help eliminate harmful bacteria and mold.
For non-porous surfaces, use a solution of one cup of bleach to a gallon of water. Apply it generously, ensuring you cover every corner.
Let it sit for at least 10 minutes before rinsing. For porous materials, like wood or drywall, consider specialized disinfectants that penetrate deeper.
Take your time, and don’t rush; this is about ensuring safety for you and your loved ones.
Remove Damaged Materials
Once you’ve cleaned and disinfected the affected areas, it’s time to assess the extent of the damage.
Carefully prioritize which materials need immediate removal, focusing on those that pose health risks or structural concerns.
As you dispose of these items, be sure to follow local regulations to ensure safe and responsible disposal.
Assess Damage Extent
As you begin the cleanup process, it’s crucial to thoroughly assess the extent of the damage in your home, particularly by removing damaged materials.
This step will help you understand what needs to be replaced and what’s salvageable. Remember to document everything, as this information may be necessary for your flood insurance claim.
Here are four key items to reflect on:
- Flooring: Check for warping or mold.
- Drywall: Remove any sections that have absorbed water.
- Electrical: Inspect wiring and outlets for safety.
- Furniture: Determine if items can be cleaned or need replacing.
Once you’ve assessed the damage, you might want to contact professional restoration services for help.
You’re not alone in this.
Prioritize Removal Tasks
Even though it can feel overwhelming, prioritizing the removal of damaged materials is essential for restoring your home to a safe condition.
Start with the most severely affected areas, focusing on items that pose health risks, like soaked insulation or moldy drywall. Don’t hesitate to reach out to your emergency contacts for help—having support can lighten the load.
If you have flood insurance, document the damage before you remove anything, as this will help with your claim.
Carefully sort through your belongings, keeping what’s salvageable and discarding the rest. This step clears the space and brings a sense of control during a chaotic time, helping you feel more at home in your own space again.
Dispose of Materials Properly
When dealing with flood damage, proper disposal of materials is essential for both safety and restoration.
You’ll want to verify that you’re handling damaged items correctly to protect yourself and your community. Here are some key steps to follow:
Identify hazardous waste: Check for items like batteries or chemicals that require special handling.
Separate recyclable materials: Look for recycling options for metals, plastics, and electronics to reduce landfill impact.
Dispose of non-recyclables: Place damaged furniture and drywall in designated waste bins.
Follow local guidelines: Check with your local waste management for specific disposal instructions.
Check for Mold Growth
After the floodwaters recede, it’s crucial to check for mold growth, as this can pose serious health risks. Mold thrives in damp areas, often beginning within 24 to 48 hours after flooding.
Start your mold detection by thoroughly inspecting all surfaces, including walls, ceilings, and hidden corners. Look for visible signs like discoloration or a musty smell.
To enhance mold prevention, ensure proper ventilation in your home. Open windows and use fans to circulate air and dry out affected areas.
If you find mold, clean it up immediately with a solution of water and detergent, or consider using a commercial mold remover. For larger infestations, don’t hesitate to contact professionals.
Restore and Repair
Once you’ve addressed any mold issues, it’s time to focus on restoring and repairing your home.
This process can feel overwhelming, but with the right restoration strategies and repair techniques, you can bring your space back to life.
Here are four steps to guide you:
Assess the Damage: Carefully examine each room to identify what needs repair or replacement.
Document Everything: Take photos and notes for insurance purposes, ensuring you have a record of the damage.
Prioritize Repairs: Start with structural issues and essential systems like plumbing and electrical before moving to cosmetic improvements.
Engage Professionals: If the damage is extensive, don’t hesitate to reach out to qualified contractors who can help restore your home safely and effectively.
Prevent Future Flooding
To effectively prevent future flooding, it’s essential to take proactive measures that address both external and internal factors.
Start by installing flood barriers around your home; these can be simple yet effective in redirecting water away from your property during heavy rains.
Next, evaluate your drainage systems. Make sure they’re clear of debris and functioning properly to handle excess water. If necessary, consider upgrading to a more robust drainage solution that fits your landscape.
Additionally, check your gutters and downspouts regularly. Keeping them clean prevents overflow that can lead to water pooling near your foundation.
You might also want to landscape strategically, using native plants that can absorb more water.
Finally, stay informed about local weather patterns and have a plan in place. By taking these steps, you not only protect your home but also foster a sense of community resilience that brings you closer to your neighbors.
Frequently Asked Questions
How Long Does It Take to Dry Out a Flooded Home?
It usually takes several days to weeks to dry out a flooded home. Using effective drying techniques and consistent moisture monitoring can greatly speed up the process, helping you reclaim your space and peace of mind.
Can I File an Insurance Claim for Flood Damage?
Yes, you can file a claim for flood damage if you have flood insurance. Some flood claims come from low-risk areas. Understand the claim process to ensure you’re adequately supported during this challenging time.
What Are the Health Risks After a Home Flood?
After a home flood, you face serious health risks like mold exposure and waterborne illnesses. It’s essential to address these hazards promptly, ensuring your safety and well-being while fostering a sense of community support during recovery.
Should I Hire Professionals or Do It Myself?
You should consider your comfort level and the damage’s severity. DIY cleanup can save money, but professional services ensure thoroughness and safety. Trust your instincts; sometimes, getting help fosters community support and peace of mind.
How Can I Prevent Mold After Flooding?
To prevent mold, focus on moisture control. Quickly dry out your space, use dehumidifiers, and ensure proper ventilation. Regularly check for leaks and dampness—your proactive steps can create a healthier, mold-free environment for everyone.
Conclusion
Cleaning up after a flood can feel like steering through a stormy sea, but by following these steps, you can guide your home back to safety. Remember, each action you take, from removing damaged materials to preventing future flooding, is a step toward restoring your sanctuary. Stay vigilant for mold and prioritize repairs, ensuring your space is livable and thriving. With patience and diligence, you’ll turn your flooded home into a beacon of resilience and safety.