Imagine waking up to find a rain-soaked wall, much like discovering a leaky boat slowly sinking. Water damage can be deceptive, often lurking beneath the surface and causing more harm than you realize. To effectively tackle this issue, you need a clear plan and the right tools at hand. Let’s explore the essential steps you’ll need to follow to restore your walls and protect your home from future threats.
Key Takeaways
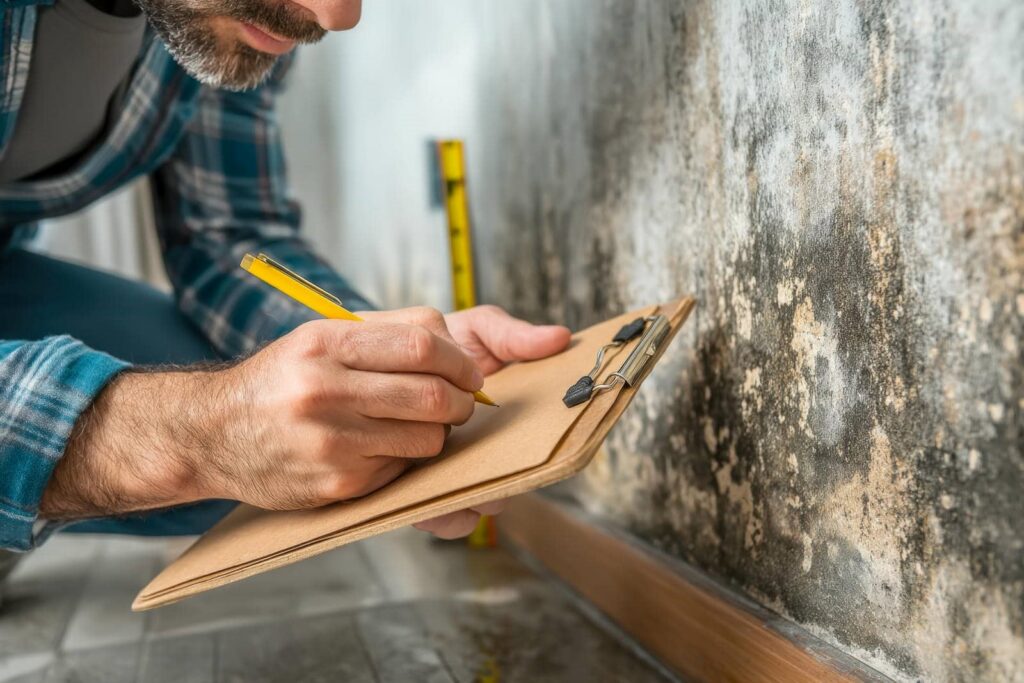
- Assess the extent of water damage using a moisture meter and check for mold or structural issues before starting repairs.
- Gather necessary tools and materials, including drywall, joint compound, safety gear, and moisture-resistant treatments.
- Remove damaged wall material carefully using a utility knife and pry bar, ensuring no hidden electrical wiring is disturbed.
- Clean and disinfect affected areas thoroughly, applying mold removal solutions and allowing surfaces to dry completely.
- Install new drywall securely, tape and mud seams, and apply moisture-resistant paint to prevent future damage.
Assessing the Extent of Water Damage
When dealing with water-damaged walls, you’ll want to start by determining how severe the damage really is.
Begin by identifying water sources; check for leaks in pipes, roofs, or windows that might’ve caused the issue. Once you’ve pinpointed the source, it’s time to evaluate moisture levels in the affected area.
Use a moisture meter to get accurate readings, as this helps you understand how deeply the water has penetrated the wall materials. Look for any signs of mold or discoloration, as these can indicate more extensive damage.
Remember, not all water damage is visible at first glance, so thorough inspection is vital. By taking these steps, you’ll gain a clearer picture of what you’re facing, helping you decide on the best course of action.
Knowing the extent of the damage helps you feel more prepared and connected to the repair process.
Gathering Necessary Tools and Materials
Before you start repairing water-damaged walls, you’ll need to gather some essential tools and materials.
Make certain you’ve got items like a putty knife, drywall patches, and mold-resistant paint on hand, along with safety gear such as gloves and a mask.
Having everything ready will streamline the process and help ensure your repairs are effective.
Essential Tools Required
To effectively repair water-damaged walls, you’ll need a handful of essential tools and materials at your disposal. Start with a good utility knife for cutting away damaged drywall.
You’ll also want a stud finder to locate supports behind your walls, ensuring your repairs are secure. A tape measure helps you accurately size your replacement materials.
For patching, grab a putty knife and joint compound, which are crucial for smooth finishes. A sanding block will help you achieve a seamless surface.
Don’t forget safety gear, like gloves and a mask, to protect yourself from mold and debris. With these tools in hand, you’re well-equipped to tackle those water damage repair techniques confidently and effectively.
Materials for Repair
Gathering the right materials is essential for a successful repair of water-damaged walls. Start by acquiring quality repair materials like drywall, joint compound, and tape.
You’ll need a utility knife for cutting the drywall and a putty knife for applying the joint compound smoothly. Don’t forget sandpaper to ensure a flawless finish.
For wall treatments, consider moisture-resistant paint or wallpaper to prevent future damage. If your walls were previously painted, you might want to use a primer designed for water-damaged surfaces.
Check your local hardware store for options that fit your style and budget. With these materials on hand, you’ll restore your walls and create a home that feels inviting and secure.
Safety Gear Needed
When tackling water-damaged walls, prioritizing your safety should be at the forefront of your repair efforts.
Before you plunge in, make certain you’ve gathered the right personal protective equipment to adhere to safety compliance guidelines.
Here’s what you’ll need:
- Safety goggles – Protect your eyes from debris and chemicals.
- N95 respirator mask – Shield your lungs from mold spores and dust.
- Heavy-duty gloves – Keep your hands safe from sharp edges and contaminants.
Wearing this gear protects you and ensure a smoother repair process.
By taking these precautions, you’re creating a safer environment for yourself and anyone else involved.
Removing Damaged Wall Material
Before you start removing damaged wall material, assess the extent of the damage to identify what needs to go.
Make sure you have the right tools on hand, like a utility knife and pry bar, to make the process smoother.
Also, don’t forget to follow safety precautions, such as wearing gloves and a mask, to protect yourself during the removal.
Assessing Wall Damage
How can you effectively assess water damage to your walls and determine what needs to be removed? Start by identifying moisture sources, which might include leaks, flooding, or high humidity.
Next, evaluate the extent of the damage by checking for discoloration, warping, or mold growth. Understanding wall materials is essential because different materials react differently to water exposure.
- Inspect drywall for softness or sagging.
- Look for peeling paint or wallpaper.
- Check for a musty smell, indicating hidden mold.
Once you’ve assessed the damage, you’ll know what to remove. Removing only the affected areas will help restore your walls while preventing further issues.
Taking these steps ensures a thorough and effective repair process.
Tools Needed for Removal
Equipping yourself with the right tools is vital for effectively removing damaged wall material. Start with a utility knife or drywall saw to cut through the affected area. A pry bar will help you remove any stubborn pieces of drywall or paneling.
You’ll also need a hammer to assist in loosening nails or fasteners. For precise removal, consider a reciprocating saw, especially for thicker wall materials. Don’t forget a measuring tape to gauge the area you’ll repair.
Gloves and safety goggles are imperative for protection during the removal process. Familiarize yourself with various removal techniques, as this knowledge will streamline your efforts and ensure a more successful repair.
With the right tools in hand, you’ll feel confident tackling the task ahead.
Safety Precautions to Follow
Removing damaged wall material can expose hazards, making safety precautions essential. Before you start, gear up to protect yourself and your home.
- Wear a mask to prevent inhaling mold spores.
- Turn off electricity in the work area for electrical safety.
- Use gloves to avoid skin contact with any contaminants.
To ensure mold prevention, seal off the area with plastic sheeting. This keeps spores from spreading throughout your home.
Always check for hidden electrical wiring behind the walls; it’s vital to avoid shocks. By following these safety measures, you can tackle the removal process confidently, ensuring your space remains safe and healthy.
Cleaning and Disinfecting Affected Areas
Once you’ve identified the water-damaged areas, it’s vital to clean and disinfect them thoroughly to prevent mold growth and further damage.
Start by wearing protective gear, including gloves and a mask, to safeguard yourself. Use a mixture of water and mild detergent to scrub the affected surfaces, making sure you remove any visible dirt or debris.
Next, apply a commercial mold removal solution or a homemade vinegar solution to disinfect the area. This step is essential, as effective sanitation techniques will help eliminate mold spores that can linger.
Allow the surface to dry completely, as moisture can promote mold regrowth.
Finally, regularly inspect the cleaned areas for any signs of recurring mold. By taking these proactive steps, you’re not just repairing your walls; you’re fostering a healthier environment for yourself and your loved ones.
Together, let’s make certain your home stays safe and welcoming.
Repairing Structural Damage
After cleaning and disinfecting the affected areas, it’s time to address any structural damage caused by the water intrusion. Confirming the structural integrity of your home is crucial, especially when dealing with load bearing walls.
Here are some steps you should follow:
- Inspect for cracks or bulges in the walls.
- Check for signs of rot in wooden structures.
- Assess the foundation for any shifting or settling.
If you notice significant damage, consulting a professional is essential. They can evaluate the extent of the issues and recommend repairs.
For minor damage, you might be able to reinforce weakened areas with additional framing or support beams. Always prioritize safety and make certain any repairs you undertake will uphold the strength of your load bearing walls.
Installing New Wall Material
As you prepare to install new wall material, it’s important to choose the right type that suits your home’s needs and aesthetics. Start by selecting insulation that provides adequate thermal performance and soundproofing. Fiberglass batts are a popular option, but consider foam board for superior insulation in specific areas.
Next, when installing drywall, measure your wall space accurately. Cut the drywall to fit, ensuring you leave gaps for windows and doors. Secure the drywall sheets to the studs using screws, making sure to space them properly for stability. Don’t forget to stagger your seams for a stronger finish.
After installing the drywall, you’ll need to tape and mud the seams to create a seamless appearance. This step may take some practice, but it’s vital for a professional-looking result.
Sealing and Painting the Repaired Area
With the drywall securely in place, it’s time to focus on sealing and painting the repaired area to confirm a polished finish. You’ll want to use effective sealing techniques to ensure moisture resistance and longevity.
Start by applying a high-quality primer, especially if you’ve used patching compounds that might absorb paint differently.
- Choose a paint type that’s appropriate for the room’s environment, like moisture-resistant paint for bathrooms.
- Use a roller for even coverage, and a brush for edges and corners.
- Don’t rush; allow each coat to dry properly before applying the next.
Once the primer is dry, follow up with your chosen paint. Aim for at least two coats for a vibrant, uniform look.
Preventing Future Water Damage
To effectively prevent future water damage, it’s crucial to identify and address potential sources of moisture before they escalate.
Start by inspecting your home for leaks, especially around windows, roofs, and plumbing fixtures. If you spot any issues, tackle them immediately to avoid bigger problems down the line.
Consider using waterproofing techniques, such as applying sealants and coatings to vulnerable areas.
Installing moisture barriers in basements or crawl spaces can considerably reduce humidity levels and protect your walls from moisture intrusion.
Don’t forget about proper drainage; make sure gutters and downspouts direct water away from your foundation.
Regularly check and maintain these systems to keep water flow in check.
Final Inspection and Touch-Ups
After confirming your home is protected against future water damage, it’s time to focus on evaluating the repairs you’ve made. This is where the final touches come into play.
A thorough inspection verifies everything looks great and functions properly. Use an inspection checklist to guide your review:
- Check for any remaining water stains or discoloration.
- Verify all repairs, including paint and drywall, are smooth and even.
- Test for any lingering odors that might indicate moisture.
Take your time as you go through each room. Even small imperfections can affect your home’s overall appeal. If you spot any issues, address them immediately.
A little extra effort now can save you headaches later. Once you’ve completed your inspection and touch-ups, you’ll feel proud of your work and the safe, welcoming space you’ve created for yourself and your loved ones.
Frequently Asked Questions
How Long Does It Typically Take to Repair Water-Damaged Walls?
Typically, repairing water-damaged walls takes about one to two weeks. First, you’ll conduct a damage assessment, then proceed with repairs. The duration may vary depending on the extent of the damage and your resources.
Can I Repair Water-Damaged Walls Myself, or Should I Hire a Professional?
You can tackle DIY repairs if you’re handy, but for extensive damage, hiring professional services is wise. It ensures safety and quality, making your home feel welcoming again. Trust your instincts and choose what feels right.
What Are the Signs of Hidden Water Damage in Walls?
You’ll notice signs of hidden water damage like peeling paint, warped walls, or a musty odor. Use moisture detection tools to find hidden leaks, ensuring your home stays safe and comfortable for you and your loved ones.
Will Homeowners Insurance Cover the Cost of Water Damage Repairs?
Yes, homeowners insurance often covers water damage repairs, but it depends on your policy specifics. Check your insurance coverage for exclusions or limitations, and consider filing a claim if you’ve confirmed water damage.
How Can I Prevent Mold Growth After Repairing Water-Damaged Walls?
An ounce of prevention’s worth a pound of cure. To prevent mold growth, focus on moisture control by ensuring proper ventilation, using dehumidifiers, and sealing repaired areas. Regularly inspect for leaks to keep your home safe.
Conclusion
You’ve weathered the storm of water damage and emerged with a sturdy, restored wall. By following these steps, you’ve not only repaired the physical structure but also fortified your home against future leaks. Like a phoenix rising from the ashes, your space is ready to shine once more. Keep an eye out for moisture and remember, a little prevention goes a long way. With your new wall in place, enjoy the peace of mind that comes with a job well done.