If you find yourself facing water damage, it’s essential to act quickly. First, you’ll need to assess the damage to understand the extent of the problem. From there, removing affected materials becomes a priority. But don’t rush into restoration just yet—there are key steps to follow to ensure a lasting fix. Let’s explore how to tackle this effectively.
Key Takeaways
- Identify and eliminate sources of moisture, such as leaks in pipes or roofs, to prevent further damage.
- Remove affected materials like soaked drywall and insulation, ensuring proper disposal to avoid contamination.
- Allow walls to dry completely before starting repairs, using dehumidifiers if necessary for effective moisture removal.
- Clean and prime walls thoroughly before applying at least two coats of mold-resistant paint for durability.
- Regularly inspect for moisture sources and maintain painted surfaces to prevent future water damage.
Assessing the Damage
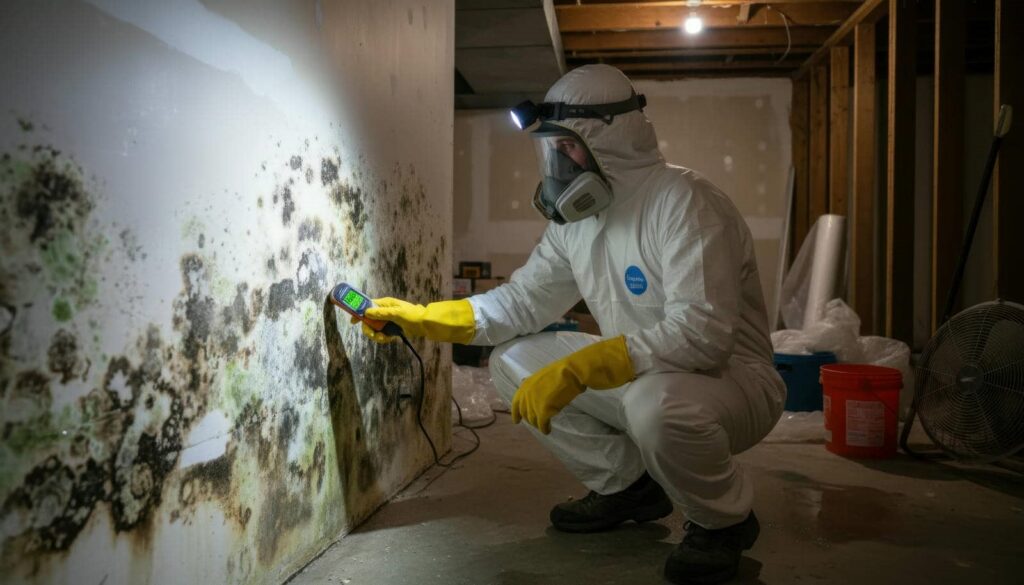
When you discover water damage in your walls, the first step is to assess the extent of the problem. Start by identifying sources of moisture, like leaky pipes or roof leaks. Check around windows and doors, as these areas often harbor hidden issues.
Use a moisture meter to gauge dampness levels; this’ll help you evaluate severity and determine how much damage has occurred.
Next, inspect the affected areas for discoloration, warping, or mold growth. Document your findings with photos for future reference.
Understanding the severity of the damage is vital; minor issues may only need simple repairs, while extensive damage could require professional intervention.
Removing Affected Materials
Once you’ve assessed the damage and identified the extent of the water intrusion, it’s time to start removing the affected materials.
Begin by wearing protective gear, including gloves and a mask, to guard against mold growth. Carefully cut away any soaked drywall using a utility knife, ensuring you remove at least 12 inches above the waterline to eliminate hidden moisture.
Next, you’ll need to tackle insulation removal. Pull out any wet insulation from the wall cavities, as it can trap moisture and foster mold. Dispose of these materials properly to prevent further contamination.
Be thorough—check behind baseboards and in corners for any signs of dampness.
Once you’ve cleared the affected areas, allow everything to dry completely before moving on. Taking these steps ensures a solid foundation for future repairs and keeps your living space safe and healthy.
Restoring and Repainting Walls
As you prepare to restore and repaint the walls, it’s crucial to verify they’ve dried completely and are free from any lingering moisture.
Start by thoroughly cleaning the surfaces; this ensures any dust or debris won’t interfere with your fresh paint.
When you’re ready to begin, examine for any imperfections such as cracks or holes. Fill them with a suitable filler, then sand the area smooth for a seamless finish.
Next, you’ll want to prime the walls, especially if they’ve been stained or if you’re changing colors. This step enhances adhesion and provides a uniform base for your topcoat.
When selecting paints, consider a mold-resistant option, especially in areas prone to moisture. Choose colors that resonate with your style, creating a warm and inviting atmosphere.
Finally, apply at least two coats for durability and a polished look. Enjoy transforming your space into a cozy haven!
Frequently Asked Questions
How Can I Prevent Future Water Damage to My Walls?
To prevent future water damage to your walls, use waterproofing techniques and ensure regular maintenance. Seal cracks, check gutters, and address leaks promptly. Staying proactive helps create a safe, dry space you can truly enjoy.
Is Mold Growth Likely After Water Damage?
Mold’s like a sneaky shadow that thrives after water damage. To prevent it, you’ve got to keep humidity low and dry out your walls quickly. Regular ventilation and dehumidifiers can help you stay mold-free.
What Tools Do I Need for This Repair Process?
You’ll need essential repair tools like a utility knife, drywall saw, hammer, and measuring tape, along with wall materials such as drywall, joint compound, and tape. These will help you effectively restore your damaged walls.
Should I Hire a Professional for Severe Damage?
If you’ve got severe damage, it’s wise to call in professional help. They’ve got the tools and expertise to tackle tricky issues, ensuring your home’s safe and sound. Don’t hesitate; your peace of mind matters!
How Long Does It Take to Fully Dry the Walls?
It usually takes 24 to 48 hours for walls to dry, depending on moisture levels and ventilation. Make sure you use fans or dehumidifiers to speed up the drying time and prevent further damage.
Final Thoughts
By following these three key steps, you can effectively repair water-damaged walls and protect your home. Imagine discovering a damp patch behind your living room drywall after a heavy rainstorm. By using a moisture meter, you identify the source, remove the affected drywall, and restore the area with mold-resistant paint. You prevent further damage while creating a safe, inviting space for your family to enjoy. Take action now to safeguard your home!