
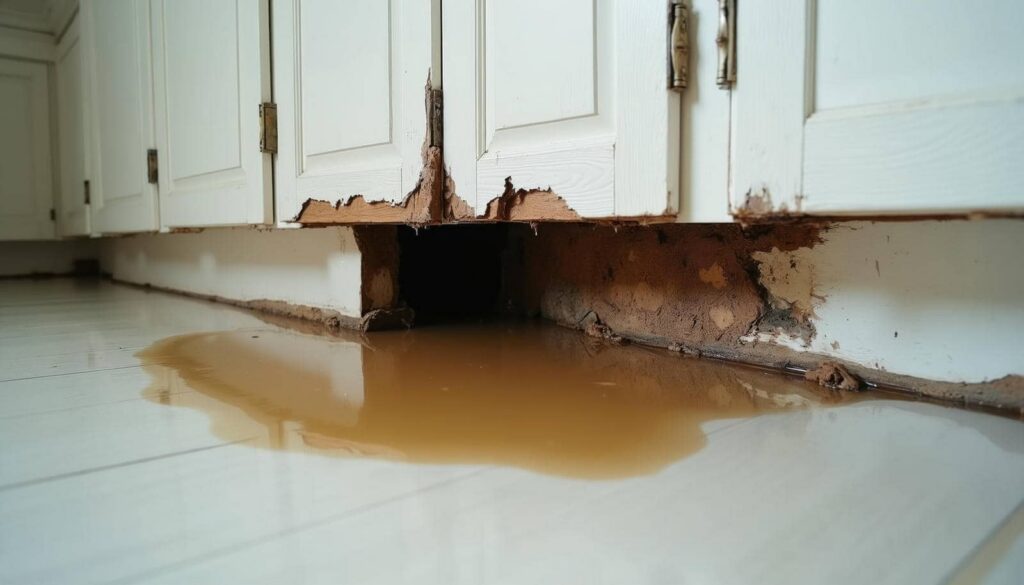
After water damage, you need to act fast because water moves into floors, walls, and insulation within hours. You’ll want to stop the source, sort what can be saved, and start drying before hidden moisture turns into a bigger problem. The first 24 hours often decide how much damage you face next, and mold can begin soon after if conditions stay wet.
Key Takeaways
- Water quickly soaks into drywall, wood, and carpet, causing swelling, staining, and trapped moisture.
- Stop the water source immediately and document damage with photos for insurance claims.
- Begin extraction and drying within 24 hours to reduce structural damage and mold growth.
- Save nonporous items like metal and glass, but discard soaked porous materials and contaminated textiles.
- Watch for mold within 24 to 48 hours and call experts if it spreads or returns.
What Happens in the First 24 Hours After Water Damage
During the first 24 hours after water damage, moisture begins soaking into porous materials like drywall, wood, insulation, and carpet. The faster you act, the more you can limit structural damage and mold growth.
You should begin an immediate response by documenting affected areas and starting a water damage assessment to identify what’s wet, what’s salvageable, and what needs removal.
Expect surfaces to swell, finishes to stain, and hidden cavities to trap damp air. Humidity rises quickly, so drying conditions matter.
When you move with a clear plan, you protect your home and stay in control. You’re not alone in this process; many homeowners face the same first-day decisions.
Fast, careful action gives you the best chance to restore safe, stable conditions.
Stop the Water and Find the Source
First, shut off the water supply to stop additional damage and reduce pressure in the affected lines.
Then trace the leak source by checking fixtures, supply lines, appliances, and visible pipe joints for active seepage.
Don’t overlook hidden water paths, since moisture can travel behind walls, under flooring, and into ceilings before you see the source.
Shut Off Water Supply
If the water is still flowing, shut off the main supply immediately to limit further damage and make the area safer to assess. Use the valve at the meter, crawlspace, or utility room, depending on your setup.
If you’re unsure, follow posted water shutoff techniques or contact your utility provider for guidance. This emergency response step protects flooring, drywall, and wiring from ongoing saturation.
Next, open a faucet to relieve pressure in the lines and confirm the system is no longer feeding water into the space.
If you share the property, let everyone know the water is off so no one accidentally restores it. You’re not handling this alone; taking fast, deliberate action gives you control and helps your home stay recoverable.
Trace The Leak Source
Once the water stops, trace the leak source so you can prevent a repeat loss and plan the right repair.
Start with the obvious fixtures: sinks, toilets, tubs, appliances, and supply lines. Check for active drips, loose fittings, damp valves, and pressure changes.
If you can’t see the origin, use leak detection tools like moisture meters or listening devices, or call a pro for a plumbing inspection. You’re not looking for guesswork; you’re confirming the exact point where water escaped.
Document what you find with photos and notes, then match the source to the damage pattern. That helps you talk with your team, your plumber, and your insurer with confidence.
When you identify the source early, you protect your home and your people.
Inspect Hidden Water Paths
Look beyond the visible drip, because water often travels through framing, insulation, subfloors, and ceiling cavities before it shows up as a stain.
You’ll need to inspect hidden water paths to stop ongoing damage and find the real source. Use water detection tools, check for hidden moisture, and follow the trail with care. Trust the process—you’re not missing anything; water just moves quietly.
- Damp baseboards
- Swollen drywall seams
- Musty insulation
- Dark subfloor edges
- Dripping pipe joints
Open access panels, lift flooring if needed, and examine around vents, fixtures, and wall penetrations.
If you catch moisture early, you can dry the structure faster, reduce repairs, and protect the space you share.
How Water Damage Spreads Indoors
Although water may seem contained at first, it can spread quickly through floors, walls, insulation, and hidden cavities.
You’ll often see moisture migration follow framing, pipes, and electrical penetrations, where capillary action and gravity pull it farther than you’d expect.
As damp materials swell, warp, or delaminate, your home’s structural integrity can weaken in subtle ways.
Drywall can soften, wood can stain, and insulation can trap humidity, extending the affected area beyond the visible stain.
In shared walls or multi-level spaces, moisture can travel between rooms, making the problem feel bigger than it first looked.
You’re not dealing with failure alone; this is a common indoor response to water intrusion, and understanding its path helps you protect the space you belong to.
Water Damage Cleanup in the First 24 Hours
The first 24 hours matter because swift cleanup can limit structural damage, reduce mold risk, and improve recovery. You should start an emergency response by shutting off water, documenting conditions, and calling a qualified restoration team. Their equipment can extract standing water, dry hidden cavities, and track moisture levels before problems spread.
- Wet floors and baseboards
- Damp drywall edges
- Pooled water under cabinets
- Humid air in closed rooms
- Stained walls near the leak
You’ll also want clear photos and notes for insurance claims, since records help show what happened and when.
Stay close to the team’s guidance; they’ll help you feel prepared, informed, and supported. Fast action doesn’t just protect materials—it helps you regain control and move forward with confidence together.
What to Save and What to Toss After Water Damage
You can often save hard, nonporous items like metal, glass, and some sealed plastics if you clean and dry them quickly.
Porous materials such as soaked drywall, insulation, carpeting, and upholstered items usually need to be discarded because they trap moisture and contaminants.
When you sort items, check for swelling, warping, stains, and odor, since these signs help you decide what’s salvageable and what isn’t.
Salvageable Household Items
After water damage, you can often save hard, nonporous items if you dry and clean them quickly, but porous materials usually need to go. You’re not dealing with this alone; a methodical check helps you protect what still has value.
- Metal chairs with wiped joints
- Glass decor that’s rinsed and dried
- Plastic storage bins, if unstained
- Sealed counters and laminate shelves
- Framed photos with intact backing
For furniture restoration, focus on solid wood, metal, and pieces with removable cushions.
For electronics assessment, unplug devices, inspect for corrosion, and have a pro test them before reuse.
Keep items in a dry, ventilated space and monitor for warping or odor.
If you act early, you can often salvage reliable household essentials and regain control fast.
Items To Discard
When water has soaked into materials that can’t be fully dried, cleaned, or disinfected, you’ll usually need to discard them to prevent mold, odors, and hidden deterioration.
Toss porous items like soaked insulation, carpet pad, ceiling tiles, and contaminated textiles, because they trap moisture and microbes deep inside.
You should also replace swollen particleboard, warped drywall, and damaged furniture with hidden joints, foam, or particle cores that won’t recover reliably.
Food, cosmetics, medications, and any item touched by sewage or floodwater need immediate disposal.
If an object smells musty after drying, or you can’t verify sanitation, err on the side of safety.
This helps protect your home, your crew, and the people who count on you.
How Drying and Dehumidifying Work
Once standing water is removed, drying equipment takes over to pull hidden moisture out of materials before it can spread or fuel mold growth. You’ll see technicians place fans, air movers, and dehumidifiers in targeted zones, using drying techniques that push damp air toward the machines.
Then dehumidifying methods capture that vapor and lower indoor humidity, helping walls, floors, and fabrics release trapped water faster.
- Air streams sweep across wet carpet
- Warm air lifts moisture from drywall
- Dehumidifiers collect water into tanks
- Sensors track progress in each room
- You regain a safer, drier space
This process works best when you stay patient and let the equipment run continuously.
You’re not alone—these steps help your home recover with structure and control.
Signs Mold Starts Growing After Water Damage
Even with fast drying, mold can begin forming in as little as 24 to 48 hours if moisture remains trapped in walls, carpet, or insulation.
You may notice a musty odor, dark spotting, peeling paint, or soft drywall. You might also see condensation, damp baseboards, or a fuzzy film on surfaces that stayed wet.
These early clues often point to mold growth before it spreads widely. Check hidden areas near sinks, windows, and flooring junctions, because moisture can linger there.
If you spot these signs, keep the area dry, improve airflow, and remove soaked materials that can’t be fully cleaned.
Following prevention strategies now helps you protect your space and stay confident that your home is recovering well.
Why Black Mold Should Be Removed Quickly
Black mold should be removed quickly because it can spread through damp materials and continue releasing spores into the air, which may worsen indoor air quality and increase health risks.
You protect your home faster when you treat removal urgency as part of mold health management, not an optional cleanup. If you wait, colonies can deepen into drywall, insulation, and carpet backing.
- dark stains along baseboards
- musty air after rain
- soft, swollen drywall
- speckled grout lines
- damp insulation behind walls
Acting early helps you reclaim a safer, more comfortable space for everyone inside.
You’re not overreacting; you’re responding to active growth that can keep expanding in hidden, moisture-rich areas.
Keep drying surfaces, reduce humidity, and remove affected materials promptly.
When to Call Mold Remediation Experts
If mold keeps returning after you dry the area, or if it’s spread into drywall, insulation, subfloors, or HVAC components, it’s time to call mold remediation experts.
You shouldn’t wait when growth affects hidden materials, because you may need a professional assessment to measure damage, identify moisture sources, and map contaminated zones.
These specialists use containment, filtration, and material-specific removal methods that protect your home and your household.
They’ll also tell you whether adjacent rooms need inspection, so you can feel confident you’re not handling this alone.
By bringing in experts early, you get clear answers, safer cleanup, and practical mold prevention strategies tailored to your space.
That support helps you move forward with less stress and more control.
How to Prevent Mold After Water Damage
To prevent mold after water damage, you need to remove moisture fast and keep surfaces dry until the area is fully stable. You’ll protect your home by using proven mold prevention techniques and strong air circulation methods. Open windows if weather allows, run fans, and dehumidifiers, and check hidden spaces behind furniture and baseboards.
Act like a careful team member in your own recovery: inspect, dry, and verify.
- Damp carpet lifted for airflow
- Sunlight reaching open curtains
- Fans pushing stale air outward
- Dehumidifier humming beside wet drywall
- Clean towels stacked for quick wiping
You should discard soaked porous items that can’t dry completely. Clean hard surfaces with detergent, then dry them again.
If you catch the moisture early, you’ll keep your space safer, fresher, and easier to share confidently with others.
Frequently Asked Questions
Does Homeowners Insurance Cover All Types of Water Damage?
No, you don’t get coverage for all water damage. Your policy usually covers sudden, accidental losses, but not flooding or neglect. Review exclusions, document damage, and file insurance claims promptly to protect your recovery.
How Long Does It Take for Drywall to Weaken After Flooding?
Usually within 24 to 48 hours, your drywall can weaken after flooding—like a sponge losing shape. You’ll want a moisture assessment quickly, because drywall deterioration starts fast, but prompt drying and repairs can still protect your home.
Can I Stay in My House During Water Damage Cleanup?
You can stay if cleanup safety is confirmed, but leave when contamination, electrical hazards, or structural damage exist. You’ll often need temporary housing. Ask technicians to assess risks, so you stay protected and informed.
Are Hardwood Floors Salvageable After Prolonged Water Exposure?
Yes, you can often salvage them—if you act fast and get a moisture assessment. Haven’t you seen floors rebound? Your hardwood restoration team can dry, stabilize, and repair boards before cupping, warping, or rot spread.
Should I Hire a Plumber or a Restoration Company First?
Hire a plumber first if you’ve got an active leak or plumbing emergency, then call a restoration company to start the restoration process. You’ll protect your home faster and feel supported through each step.
Final Thoughts
If you act fast after water damage, you can limit structural loss and reduce mold risk. Shut off the source, remove standing water, and dry materials within the first 24 hours before moisture spreads into walls, floors, and insulation. If you think, “It’s just a little damp,” picture hidden water feeding mold behind your drywall. When damage is extensive, call a water damage or mold remediation expert right away.