When a pipe bursts right after you notice a damp floor, you don’t have time to guess. Rapid Structural Drying should begin by shutting off the source, removing standing water quickly, and stripping out materials that hold moisture. Then you need to expose hidden wet areas, place air movers for direct airflow, and track moisture readings with a meter. If you miss framing, subfloors, or insulation, drying can stall, and mold can start before you expect it.
Key Takeaways
- Shut off the main water source immediately and verify all fixtures stop flowing.
- Remove standing water fast with pumps or wet vacs, starting at the lowest areas.
- Set up air movers and dehumidifiers right away to create steady airflow and lower humidity.
- Use moisture meters and thermal imaging to find hidden dampness in walls, floors, and cavities.
- Monitor moisture daily, replace saturated materials, and keep indoor humidity below 60% to prevent mold.
Start Structural Drying Immediately
As soon as the water source is controlled, you need to start structural drying immediately to limit moisture migration and reduce the risk of secondary damage.
You protect the building by acting fast, because wet materials keep wicking moisture into framing, subfloors, and insulation.
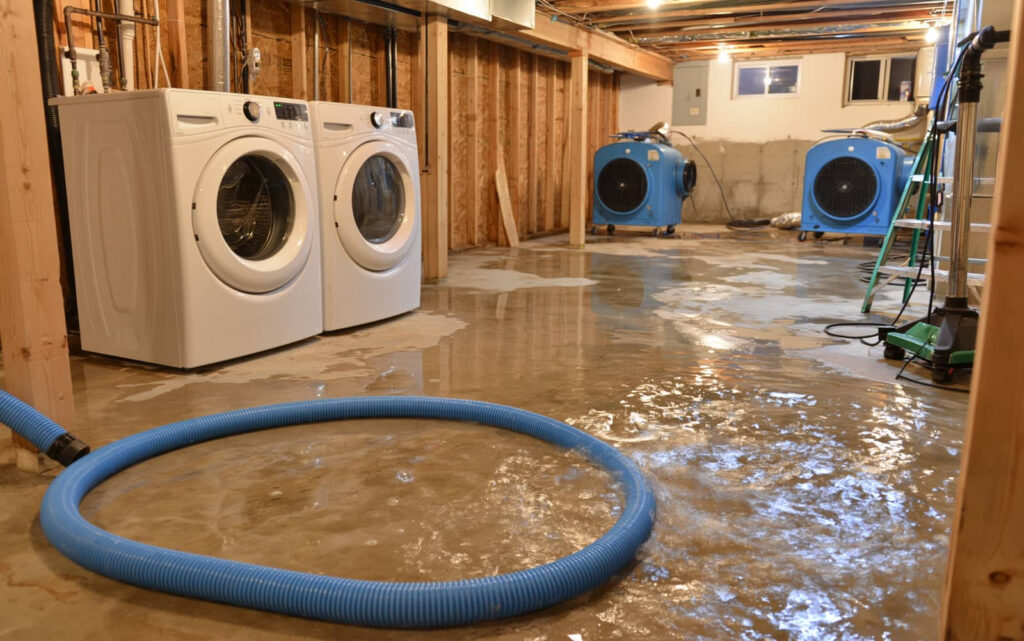
Set up drying equipment right away, including air movers and dehumidifiers, and position them to create steady airflow across affected surfaces.
Monitor moisture levels with meters, then adjust placement as materials release water.
Your team’s emergency readiness matters here, because every hour counts when you’re keeping a property stable and salvageable.
Document conditions, track progress, and keep access clear so you can work efficiently.
When you move quickly and methodically, you help your customers feel supported and your crew stay aligned.
Stop the Water Source and Extract Standing Water
Shut off the water supply as soon as you locate the source to stop further intrusion.
Then remove any standing water with pumps, wet vacs, or extraction equipment.
The faster you control and extract the water, the less damage you’ll have to manage.
Shut Off Water Supply
Quickly locate the source of the leak and close the main water valve to stop further intrusion. You cut off pressure, protect nearby materials, and keep the damage from spreading.
If you’re in a shared building, alert your team and confirm who’s handling shutdown and access. Good emergency planning means everyone knows the valve location before trouble starts.
For flood prevention, label shutoffs clearly, inspect them regularly, and make sure they’re reachable. After the water supply is off, verify that fixtures no longer flow and note any lingering seepage for documentation.
This step helps you stay coordinated, reduce losses, and move into drying with confidence. When you act fast and communicate clearly, you’re part of a prepared response that limits disruption and supports recovery.
Remove Standing Water
Once the leak is controlled, remove any standing water right away to slow absorption and limit secondary damage. You should use wet vacuums, pumps, mops, and absorbent towels based on depth and surface type.
Focus first on the lowest points, then work outward so you don’t spread contamination. For carpet and pad, lift edges and extract moisture thoroughly; for hard floors, pull water from seams and corners.
These water removal techniques help protect framing, drywall, and finishes before swelling or staining starts. If the area is large, choose standing water solutions that match the material and moisture load, and keep checking for hidden pooling.
Act fast, stay methodical, and you’ll help your crew restore the space with confidence and control.
Remove Wet Materials That Trap Moisture
Remove wet materials that trap moisture as soon as you can, because soaked drywall, insulation, carpet padding, and particleboard hold water and slow drying behind walls, under flooring, and inside cavities.
You need to cut out compromised sections, bag debris, and move salvageable items to a dry staging area. That keeps your crew aligned and helps the structure recover faster.
Check adjoining moisture barriers for damage, then replace them only after the substrate reaches safe readings.
Use targeted drying techniques on exposed framing and subfloors, but don’t try to dry saturated porous materials in place.
When you remove them early, you reduce odor, microbial risk, and secondary damage.
In a tight mitigation job, every hour matters, and your disciplined cleanup helps the whole team win.
Expose Hidden Moisture in Walls and Floors
You need to detect moisture behind surfaces before it slows drying or causes hidden damage.
Check wall cavities and floor assemblies for damp insulation, trapped water, and elevated moisture readings.
Use moisture meters, thermal imaging, and inspection ports to pinpoint wet areas quickly.
Detect Moisture Behind Surfaces
Hidden moisture often lingers behind drywall, under baseboards, and beneath flooring long after surface water disappears. You need moisture detection tools to find hidden leaks before they spread or distort materials.
Use a pin or pinless meter on suspect surfaces, then compare readings across dry and affected areas. Scan trim lines, wall edges, and low spots where water can migrate.
Watch for cooler areas, soft finishes, staining, or slight swelling that signal trapped dampness. If readings stay elevated, mark the location and keep air moving to support drying.
You’ll work faster when you verify conditions instead of guessing. That approach helps your crew stay aligned, catch concealed problems early, and protect the structure from lingering damage and mold growth.
Check Floors And Cavities
Check floors and cavities next, because water often settles inside joist bays, under subfloors, and in wall voids where surface readings can look normal.
During floor inspection, lift a limited section, confirm framing condition, and document what you find.
Use cavity assessment to compare wet and dry zones, then update moisture mapping so your damage evaluation stays accurate.
Match drying techniques to material compatibility, since hardwood, plywood, and insulation each respond differently.
Improve air circulation through opened paths, and protect structural integrity by avoiding over-drying or unnecessary removal.
Keep restoration strategies practical: isolate saturated materials, sequence work by priority, and coordinate equipment selection with access and load limits.
When you work this way, you and your team stay aligned, move faster, and reduce hidden damage.
Use Tools To Find Dampness
Moisture meters, thermal imaging, and probing tools help you locate dampness that surface inspection can miss in walls and floors. You can’t rely on sight alone, so test suspect areas after removing baseboards or pulling back carpet.
Use a meter to compare readings across dry and wet zones, then confirm patterns with infrared scans and pin probes. This moisture detection process helps you map hidden pockets quickly and avoid unnecessary demolition.
During dampness assessment, record readings, mark hotspots, and recheck after airflow improves. When you work this way, you stay aligned with your crew and make faster, smarter drying decisions.
Accurate tools give you confidence, reduce guesswork, and support a cleaner restoration plan for everyone involved.
Use Air Movers to Speed Up Drying
Position air movers to create strong, focused airflow across wet surfaces and around the perimeter of the affected area.
You’ll improve drying efficiency when you choose the right air mover types for the room size, surface material, and moisture load. Axial units push air farther for open spaces, while centrifugal models deliver concentrated velocity for tighter areas and edges.
Angle each unit to sweep floors, baseboards, and wall cavities without blasting debris. Keep cords clear, stabilize each fan, and overlap airflow so no damp pocket gets left behind.
Recheck wet zones with your meter and adjust placements as materials dry. When you work this way, you stay in control, move faster, and help your team restore the space with confidence.
Run Dehumidifiers to Remove Moisture
Place dehumidifiers where airflow can reach damp materials and where you can drain collected water efficiently.
Set them to pull moisture steadily from the air so you can speed drying without overworking the equipment.
Check humidity levels often and adjust placement or runtime to keep conditions in the ideal drying range.
Dehumidifier Placement
Dehumidifiers are the workhorses of structural drying, pulling water vapor out of the air so building materials can release trapped moisture faster.
Place units where you can move the most air through the affected zone, not tucked in a corner. Match dehumidifier types to the space: LGR units suit cooler, tighter areas, while desiccant models help in larger or colder cavities.
Keep intake and exhaust paths clear so you maintain ideal airflow across wet surfaces and through doorways, hallways, and open wall cavities. You should position equipment near the center of the load, then adjust as the area dries.
In your crew, treat each machine as part of one drying system, and you’ll help the whole team work cleaner, faster, and together.
Optimal Moisture Removal
Once your dehumidifiers are set, run them long enough to keep the vapor pressure low and keep moisture moving out of the structure.
You should treat the unit as part of your team, not a background machine. Match its output to the affected area, and adjust your drying techniques as materials release water at different rates.
Use moisture mapping to track wet zones, target stubborn cavities, and confirm your efforts are reaching the right places.
Keep air pathways open so the dehumidifier can pull moisture efficiently from the room.
If you rush shutdown, trapped vapor can slow progress and force repeat work.
Stay consistent, stay organized, and you’ll help your crew finish faster with cleaner results.
Monitor Humidity Levels
Keep a close eye on humidity readings so you know whether your drying equipment is actually doing its job. You need steady moisture measurement to confirm progress and spot stalls before they slow the project.
Run dehumidifiers continuously, and place them where air can move freely around wet materials. Check humidity control targets at least twice a day, and compare current readings with baseline values from the start of drying.
If levels stay high, adjust airflow, service the units, or add more capacity. When you track changes consistently, you and your team can make faster, smarter decisions and keep the structure on pace.
Good monitoring also helps you document results, reassure occupants, and reduce the risk of hidden damage returning.
Monitor Moisture Levels Throughout Drying
Track moisture levels continuously throughout the drying process so you can verify progress and catch problem areas early.
Use moisture sensors at representative spots, then log readings at the same time each day. Compare values against baseline readings from unaffected areas so you know when assemblies are nearing dry standard.
Adjust drying techniques when progress stalls, such as adding airflow, heat, or dehumidification where readings stay high.
Check edges, corners, and concealed spaces because they often dry slower than open surfaces.
Keep your team aligned by sharing readings and trends, not guesses.
When you document changes, you build a reliable drying plan and stay with the crew that finishes cleanly, safely, and on schedule.
Dry Framing, Subfloors, and Insulation Fast
Dry framing, subfloors, and insulation as soon as you confirm they’re holding moisture below target levels, since trapped dampness can slow the job and create secondary damage.
You’ll protect structural integrity by moving air across framing materials, lifting carpet and pad, and opening cavities for direct drying.
Check moisture retention in each layer, because wet subfloors can hide water damage and extend drying duration.
Match drying techniques to the assembly: use heat and airflow for dimensional lumber, and evaluate insulation types for replacement when they won’t release moisture fast enough.
Keep your restoration methods coordinated so you don’t over-dry one area while another stays damp.
When you work this way, you keep the whole structure moving toward a clean, reliable closeout.
Prevent Mold During Drying
As moisture lingers, mold can start developing quickly, so you need to keep materials moving toward safe drying levels without delay. You protect your crew and property by applying mold prevention strategies and humidity control techniques during every drying pass.
Keep air moving across wet surfaces, remove standing water, and monitor conditions with a hygrometer. Stay consistent so your team works like a unit and avoids setbacks.
- Target indoor humidity below 60%.
- Ventilate enclosed cavities and corners.
- Replace saturated insulation that won’t dry.
- Check hidden areas daily for odor or spotting.
You’ll keep risks low when you track progress, adjust equipment, and dry each layer evenly. That discipline helps your space recover cleanly and keeps everyone on the same page.
When to Call a Water Damage Restoration Pro
If water has soaked structural materials, spread into hidden cavities, or kept humidity high after your first drying pass, it’s time to call a water damage restoration pro.
You can’t always see trapped moisture in walls, subfloors, or insulation, and delays raise repair costs. A pro uses moisture meters, thermal imaging, and a full water damage assessment to map the loss.
They’ll classify affected materials, remove unsalvageable components, and apply targeted restoration techniques that speed drying without spreading contamination.
Call sooner if you notice musty odors, warped framing, electrical risk, or repeated damp readings.
When you bring in help early, you protect your home, save time, and stay confident that the job’s being done right.
Frequently Asked Questions
How Long Should Structural Drying Typically Take?
You’ll typically need 3–5 days, though drying timeframes vary with moisture factors like material type, saturation level, airflow, and humidity. You can shorten drying by monitoring conditions closely and adjusting equipment promptly.
Can HVAC Systems Help With Drying After Water Damage?
Yes—your HVAC system can help if you run ventilation strategies and drying equipment together. Moisture removal often comes from air movement. You’ll dry faster, protect materials, and stay part of a competent recovery team.
What Tools Measure Hidden Moisture Accurately?
You’ll measure hidden moisture accurately with moisture meters and infrared cameras. You can probe surfaces, read deep material saturation, and spot temperature anomalies fast, so you’ll join the pros who verify drying precisely.
Is It Safe to Stay Home During Structural Drying?
You can sometimes stay home during structural drying if you follow safety precautions and monitor health concerns. You’ll need strong ventilation, controlled access, and dehumidifier noise tolerance; leave immediately if mold, wiring, or sewage risks appear.
Do Insurance Claims Cover Rapid Structural Drying Costs?
Usually, you’ll have insurance coverage for rapid structural drying if the damage is from a covered loss, but policies vary. You’ll need to document drying expenses, review your deductible, and confirm limits with your adjuster.
Recap
Wrap up drying as fast as you can, and keep the structure moving like a well-tuned fan. You should shut off the water source, remove standing water, and pull out materials that hold moisture. Keep air moving, monitor readings, and map damp areas so you don’t miss hidden wet spots. Stay below 60% humidity to reduce mold risk. If the damage is severe or spreading, call a water damage restoration pro right away.