
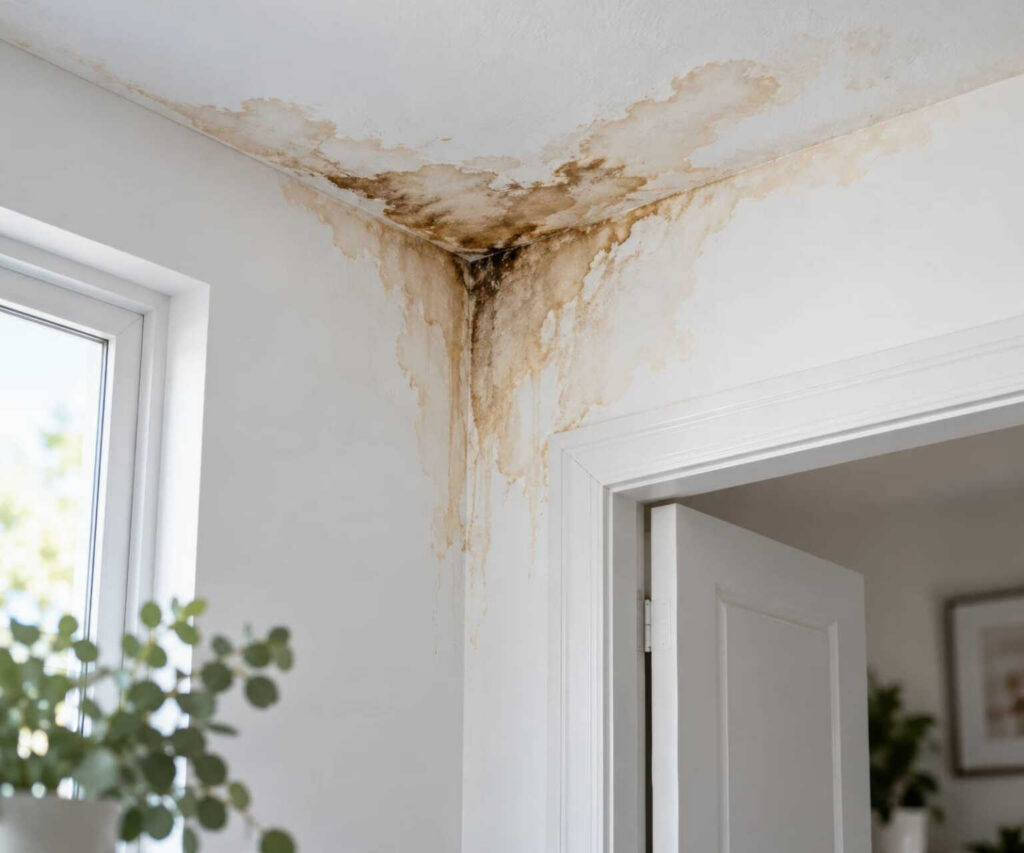
After a burst pipe soaks your basement carpet, you need to act fast to limit mold growth. You’ll stop the water source, inspect for hidden moisture, and wear proper PPE before cleanup. Then you’ll dry affected materials, remove unsalvageable porous items, and disinfect mold-prone surfaces. The key question is whether your damage has crossed the line that calls for professional remediation.
Key Takeaways
- Stop the water source immediately and document all actions to align the response.
- Remove standing water quickly, then dry the area with ventilation and dehumidifiers.
- Inspect hidden spaces for mold using moisture meters, infrared scanning, and careful opening of suspect areas.
- Wear proper PPE, keep others away, and call a professional for health concerns or larger affected areas.
- Clean nonporous surfaces, discard unsalvageable porous materials, and monitor humidity below 60% to prevent recurrence.
Stop the Water Damage
The first step in effective mold remediation is to stop the water intrusion immediately, since mold growth depends on ongoing moisture. You should locate the water source, shut it down, and verify that valves, roofs, drains, or appliances no longer feed the area.
If you’re part of a property team, document every action so everyone stays aligned. Then complete a prompt damage assessment to identify affected materials, structural impacts, and safety risks.
Remove standing water with appropriate extraction equipment and reduce humidity with ventilation or dehumidification. Don’t delay, because each hour of exposure increases deterioration.
When you act quickly and methodically, you protect the building, support your crew, and create the stable conditions needed for the next remediation step.
Check for Hidden Mold
Once the visible water has been controlled, you need to check for hidden mold in wall cavities, under flooring, behind baseboards, and inside insulation.
Use mold detection techniques such as moisture meters, infrared scanning, and targeted inspection to locate colonies that aren’t obvious on the surface. You should trace hidden moisture sources from leaks, condensation, and soaked building materials, because mold often grows where drying lagged.
Open suspect areas carefully, confirm discoloration or odor patterns, and document every finding so your team can coordinate a precise remediation plan.
When you verify concealed growth early, you protect the structure, reduce spread, and stay aligned with the standards your property needs.
Protect Yourself Before Cleanup
Before you disturb any contaminated material, put on proper personal protective equipment: an N95 or higher respirator, gloves, eye protection, and disposable coveralls.
This protective gear helps reduce inhalation, skin contact, and eye exposure to mold fragments and dust. Seal cuffs, secure the respirator, and choose gloves that resist tears so you can work confidently and safely.
Keep children, pets, and bystanders out of the area while you complete these health precautions. If you have asthma, allergies, or immune concerns, ask a qualified professional for guidance before you begin.
Replace wet, damaged PPE if it fails, and wash exposed skin after removal. When you protect yourself first, you help protect everyone in your home, too.
Dry Out Walls, Floors, and the Air
You need to dry wall cavities as soon as possible to limit concealed moisture and reduce the risk of ongoing microbial growth.
Remove wet materials that can’t dry quickly, and use dehumidifiers and directed airflow to accelerate evaporation.
You should keep air moving through the affected area until wall, floor, and ambient moisture levels return to normal.
Dry Wall Cavities
When moisture reaches drywall cavities, it can spread into wall framing, subfloors, and adjacent air spaces, so rapid drying is critical to prevent mold growth and secondary damage.
You should begin with a thorough drywall inspection to locate swollen panels, damp insulation, and hidden staining. If you find contamination, perform cavity cleaning before materials trap moisture and support microbial growth.
Remove saturated baseboards or access points as needed, then dry exposed framing and adjacent materials to target levels. You’ll protect your space by verifying that hidden cavities aren’t holding water after surface areas look dry.
Keep records of readings, damaged sections, and corrections so your team stays aligned. Precise drying now helps you restore a safe, healthy environment for everyone involved.
Improve Airflow Fast
Once cavities and affected materials are exposed, increase airflow immediately to pull moisture out of walls, floors, and surrounding air.
You should open windows only if outdoor humidity is lower than indoors, then place box fans to create directed air circulation through each wet zone.
Use ventilation techniques that exhaust damp air away from the structure, and keep interior doors open so you don’t trap moisture.
Remove baseboards or drill small access points when needed to let concealed cavities dry faster.
Position dehumidifiers near the source and empty them regularly.
Check surface conditions with a moisture meter, not guesswork, and continue drying until readings stabilize.
When you work methodically, you protect the space, support your crew, and speed recovery with confidence.
Remove Porous Materials Safely
Because porous materials can trap mold deep below the surface, remove and discard any contaminated items that can’t be fully cleaned and dried, such as drywall, insulation, carpet padding, and upholstered furniture.
You should bag debris before moving it, seal each bag tightly, and follow local safe disposal rules to limit spore spread.
Wear gloves, a respirator, and eye protection while handling these materials, and keep children and pets away from the work area.
If you’re replacing damaged components, choose mold resistant materials where practical to reduce future risk.
Work methodically, inspect hidden cavities for remaining wet sections, and document what you remove for your records.
Clean Hard Surfaces Thoroughly
Scrub nonporous surfaces with a detergent solution first, then apply an EPA-registered mold cleaner or a diluted bleach solution only where appropriate and safe for the material.
You should work methodically across hard surface materials, including metal, sealed tile, and finished wood, so you remove residue before mold can persist.
Use effective cleaning techniques: agitate with a brush, rinse with clean water, and dry the surface completely with towels or air movement.
Check seams, corners, and hardware where moisture can linger.
Wear gloves and eye protection, and keep ventilation steady while you clean.
If you belong to a team, coordinate your steps so everyone follows the same process and no area gets missed.
Consistent, careful cleaning helps restore a safe, orderly space.
Disinfect Mold-Prone Areas
After cleaning, disinfect mold-prone areas with an EPA-registered disinfectant labeled for the affected material and follow the manufacturer’s contact time exactly.
You should disinfect surfaces that remained damp, especially around baseboards, trim, and concealed edges where residue can linger. Apply the product evenly, and don’t dilute it unless the label allows dilution.
Use gloves and eye protection, and keep the area ventilated while you work. Wipe away excess only if the instructions require it.
For porous materials, test a small section first to confirm compatibility. This step supports mold prevention by reducing surviving spores on treated surfaces.
When you finish, inspect the area for missed spots so your team can maintain a clean, consistent remediation standard.
Fix Moisture Sources to Prevent Return
To prevent mold from returning, you need to identify every water entry point, including roof penetrations, window seals, plumbing joints, and foundation cracks.
You should repair leaks immediately, because even minor persistent moisture can support fungal growth.
You also need to improve drainage systems so water moves away from the structure and doesn’t reaccumulate near vulnerable surfaces.
Identify Water Entry Points
Before you can prevent mold from returning, you need to find and stop every source of moisture feeding the problem. Inspect your space methodically so you can trace water sources back to their entry points.
Check rooflines, window frames, exterior walls, plumbing penetrations, crawlspaces, and HVAC condensate paths. Use your senses and tools: look for staining, warped materials, peeling coatings, and temperature differences that signal hidden dampness.
Involve your team or building occupants, because shared observations often reveal patterns you’d miss alone. Document each condition, map its location, and prioritize areas with recurring wetting.
When you identify how moisture enters, you can control it before mold colonies reestablish. This approach supports a healthier environment and helps everyone in your home feel confident.
Repair Leaks Promptly
Once you’ve traced where moisture is entering, repair every leak as soon as possible so mold doesn’t have a chance to return.
You should inspect supply lines, drain joints, valves, and appliance connections, then replace damaged seals, corroded fittings, or cracked piping without delay.
Use leak detection tools to confirm the source is fully controlled, and recheck the area after repairs.
Keep up with plumbing maintenance by tightening loose connections and scheduling routine inspections, especially in zones that stay damp.
When you act quickly, you protect building materials, reduce hidden moisture, and support a healthier indoor environment for everyone in your space.
Document each repair so you can track recurring issues and address them before they spread.
Improve Drainage Systems
Start by correcting drainage failures that keep water pooling near the structure, because persistent saturation will feed mold even after cleanup. You should inspect gutters, downspouts, and splash blocks, then route runoff at least 6 feet away.
Regrade soil so it slopes from the foundation, and confirm landscape grading doesn’t create low spots that trap water. Install drainage solutions that match your site conditions, such as French drains, surface channels, or sump systems.
Keep foundation drains clear, and test them after heavy rain. When you control exterior moisture, you protect the whole team of occupants and support a healthier indoor space.
- Clean gutters seasonally
- Extend downspouts with solid piping
- Seal settled cracks
- Monitor wet areas after storms
Monitor for Mold After Remediation
After remediation, you should inspect the affected area regularly to confirm that mold hasn’t returned and that moisture conditions remain controlled.
Use monitoring techniques like visual checks, humidity readings, and surface inspections to detect early mold growth before it spreads. You’ll want to verify that drywall, insulation, and framing stay dry, especially near prior leak paths and condensate lines.
Keep relative humidity below 60%, and document any discoloration, musty odor, or condensation so you can track changes over time.
Check hidden spaces, such as behind baseboards and under sinks, because these spots often retain moisture.
When to Call a Mold Remediation Pro
Call a mold remediation professional when the affected area is larger than about 10 square feet, when mold keeps returning after cleaning, or when you suspect hidden growth inside walls, ceilings, or HVAC components.
You’ll benefit from a professional assessment when you notice mold symptoms such as coughing, sneezing, or musty odors that persist after drying.
- Water-damaged materials stay damp beyond 24 to 48 hours
- Contamination reaches insulation, drywall, or ductwork
- You can’t verify moisture levels with basic tools
- You need containment, HEPA filtration, and safe removal
Act early to protect your home’s structure and your household’s health.
A certified team can identify sources, document conditions, and guide the right remediation steps, so you can move forward with confidence and a stronger sense of control.
Frequently Asked Questions
How Long Does Mold Remediation Usually Take?
Usually, you’ll need 1–7 days for mold remediation, depending on contamination size, drying, and repairs. Your remediation timeline can extend if mold growth is extensive, hidden, or requires structural replacement and final clearance testing.
What Home Insurance Covers Mold Damage?
You’ll usually get mold damage covered if it results from a sudden, accidental event, like a burst pipe, and your insurance policy details include it. Review mold prevention strategies, since flood and neglect exclusions often apply.
Can Mold Return After Professional Cleanup?
Yes, mold can return after professional cleanup if you don’t control moisture, like a fire rekindled. You should use prevention strategies, monitor humidity, and repair leaks promptly to stop mold growth and protect your home.
Are Mold Test Kits Accurate for Hidden Growth?
Mold test kits can miss hidden growth, so your testing accuracy may be limited. You should rely on mold detection methods like moisture mapping and infrared imaging, then verify suspicious areas with professional sampling to protect your space.
Which HVAC Filters Help Reduce Mold Spores?
You’ll reduce mold spores best with HEPA filters, which trap fine particles efficiently, and UV lights, which can disable airborne microbes—why settle for less? Choose properly rated HVAC filtration, and you’ll protect your shared indoor space.
Summary
When you act fast after water damage, you cut mold off at the source. Stop the intrusion, inspect hidden spaces, dry materials thoroughly, and remove contaminated porous items before spores spread like wildfire. Keep humidity below 60%, disinfect risk areas, and correct every moisture source. If the affected area is larger than 10 square feet, or symptoms appear, call a certified mold remediation professional to complete a safe, compliant restoration.