
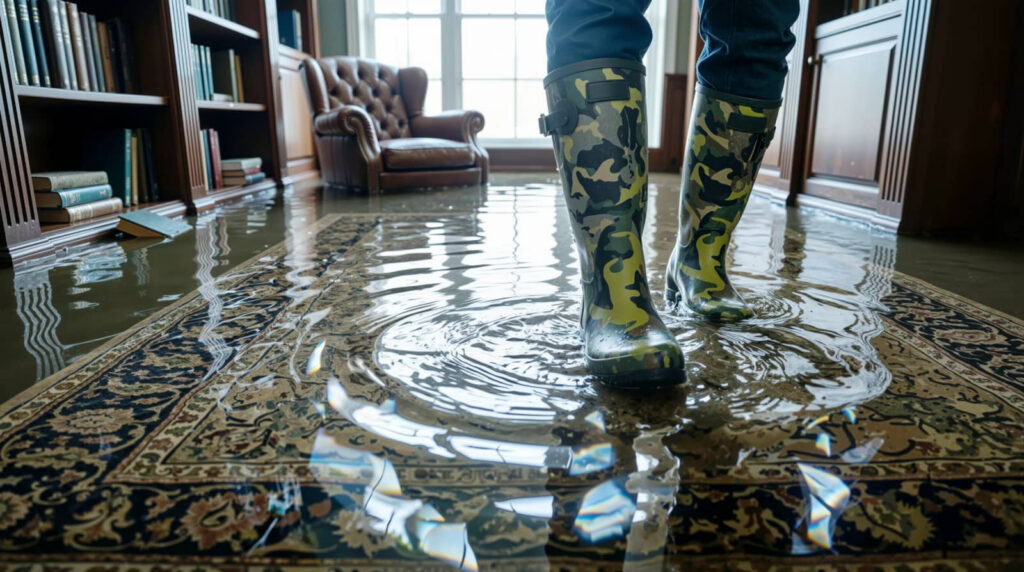
When your basement starts taking on water, you need to act in a fixed order: stop the source, assess wiring and foundation risks, and choose the right extraction tools before the damage spreads. You’ll also need a backup sump pump, a plan for wet insulation and contaminated materials, and enough airflow to control moisture. The process is more exact than it looks, and one missed step can change everything.
Key Takeaways
- Shut off the main water source and electricity if safe, then wear gloves and insulated footwear before entering the basement.
- Use submersible pumps for deep standing water and wet/dry vacs for remaining moisture, starting at the lowest point.
- Remove wet carpets, drywall, baseboards, and porous items quickly to prevent mold and further structural damage.
- Increase airflow with fans and dehumidifiers, and check hidden areas like seams, corners, and wall cavities for trapped moisture.
- Call professionals if water persists, mold appears, gas is detected, or you notice foundation, electrical, or structural damage.
Stop the Water Fast
The first thing you need to do is stop the water at its source. Shut off the main supply valve if you can reach it safely, then confirm the leak has slowed or stopped.
If runoff is entering through a door or window well, clear the path and guide it away with temporary drainage solutions. Move stored items to higher ground so you can work efficiently and protect the space.
Use emergency kits with gloves, flashlights, and towels to keep your response organized. If the source is outside, redirect pooling water away from the foundation and secure loose materials that block flow.
You’re not handling this alone; a methodical response helps everyone in your household regain control fast. Keep monitoring the area until the water stays stable.
Check for Wiring and Foundation Damage
Once the water is under control, inspect nearby outlets, cords, appliances, and the breaker panel for moisture, sparking, or corrosion, and shut off power to any affected circuit if it’s safe to do so.
You should treat wiring safety as nonnegotiable: keep hands dry, wear insulated footwear, and don’t reset breakers until a qualified electrician clears the area.
Next, examine walls, floor joints, and the slab for new cracks, bowing, or separation that could signal foundation integrity problems. Mark any changes with tape and note their location for follow-up.
If you smell gas, hear cracking, or see shifting, leave the space and call emergency services or a structural professional.
You’re not handling this alone; careful documentation helps your crew make the right repairs.
Remove Standing Water With the Right Tools
Start with the most efficient extraction tool you’ve got: a submersible pump for deeper pooling and a wet/dry vacuum for residual water and tight corners. Position your gear at the lowest point, then work outward in measured passes.
These water removal techniques keep you in control while protecting the basement crew you’re part of. Use essential tools like hoses, extension cords with GFCI protection, and a squeegee to guide water toward the intake.
- Stay calm and systematic
- Clear pathways before you start
- Empty containers before overflow
- Watch the floor for hidden pockets
- Keep your team coordinated
Check progress often, and stop when only a thin film remains. Precision now means faster drying later and fewer surprises for everyone helping.
Use a Wet Vac for Basement Water Extraction
A wet vac gives you controlled extraction for the thin water layer left after pumping, especially along edges, cracks, and low spots a submersible pump can’t reach. You move the nozzle slowly, overlap each pass, and keep the tank empty so suction stays steady.
These wet vac benefits include precise pickup, reduced residue, and better control around trim and seams. For effective results, use wet vac tips like checking the filter, securing the hose, and working from the farthest corner toward the exit.
You’ll protect your space and help your team stay organized during cleanup. If the floor still feels damp, repeat passes until no visible moisture remains.
Then sanitize the unit, empty the waste safely, and store the equipment dry for the next emergency.
Set Up a Backup Sump Pump
Choose a backup sump pump rated to match your pit volume, expected inflow, and discharge head. Then confirm that its check valve and hose diameter fit your setup.
Place it beside the primary unit with enough clearance for float movement and service access. Verify that the discharge line routes to a safe exterior outlet.
Test the power source, float switch, and startup cycle under load so you know it’ll run when the primary pump fails.
Choosing A Backup Pump
When your primary sump pump fails or falls behind, a backup pump keeps water moving and reduces the risk of basement flooding. You should compare pump types, power sources, and discharge capacity before you buy. Community-minded homeowners often choose models that match their existing pit and piping, so your system feels like part of a reliable team.
- Battery backups protect you during outages
- Water-powered units suit homes with strong municipal pressure
- Dual pumps add redundancy and calm
- Alarms warn you before damage spreads
- Corrosion-resistant housings extend service life
Check the float switch design, then verify flow rate against your basement’s likely inflow.
Pick a pump that fits your maintenance routine, and you’ll join neighbors who value readiness, not panic.
Testing Power And Placement
Before you trust a backup sump pump, test its power source and placement under real operating conditions. Plug it into the intended outlet or battery pack, then confirm the circuit holds under load.
Run water testing by adding enough water to trigger activation and verify discharge flow without delay. Watch for weak alarms, slow starts, or tripped breakers.
Next, evaluate pump placement: set the unit level, keep the intake clear, and ensure the float moves freely with no wall contact. Route the hose so it doesn’t kink or backflow.
Repeat the cycle twice, because reliable emergency protection depends on consistent behavior. When you and your household can trust each component, you reduce uncertainty and protect the space you’ve worked hard to maintain.
Dry Carpets, Drywall, and Belongings Quickly
Start with high-velocity air movement and dehumidification to dry carpets fast, lifting edges so airflow reaches the padding and backing.
Remove wet drywall, baseboards, and insulation before moisture wicks upward and causes structural damage or mold growth.
Sort belongings immediately, separate salvageable items from saturated ones, and dry documents, textiles, and hard goods with targeted airflow and clean, absorbent materials.
Rapid Carpet Drying
As soon as you’ve removed standing water, you need to move fast to dry carpets, drywall, and belongings before moisture wicks deeper into materials and mold can develop.
Lift carpet edges, expose carpet padding, and run high-velocity fans across the surface. If you can, pull furniture away and separate wet items so air reaches every side.
Check for moisture retention in seams, tack strips, and corners; those hidden zones can keep a room unsafe. You’re not alone—use a methodical, room-by-room approach:
- Open airflow paths
- Remove saturated fabrics
- Rotate belongings often
- Monitor damp spots
- Log drying progress
Keep dehumidifiers running continuously and verify conditions with a meter.
When readings stabilize, you’ll know your space is returning to a safe, shared sense of normal.
Protecting Drywall From Damage
Once the standing water is gone, you need to protect drywall immediately because gypsum board absorbs moisture fast and can lose structural integrity within hours.
Cut power to wet wall outlets, then inspect the base of each wall for swelling, staining, or a soft feel. If moisture has risen above the baseboard line, remove baseboards and open the lower edge for airflow.
You should place fans and a dehumidifier to keep air moving, but don’t overheat the area. For reliable drywall protection, install temporary moisture barriers on exposed sections and seal floor-to-wall gaps with plastic sheeting.
Check the wall cavity daily with a moisture meter. Your crew can stay ahead of hidden damage by documenting readings, maintaining dry conditions, and acting before mold starts.
Salvaging Belongings Fast
Prioritize the most salvageable items first: dry carpets, rescue drywall, and move belongings to a clean, ventilated area before secondary damage sets in. You’ll protect belonging priorities by sorting essential items immediately and isolating anything damp but recoverable.
Lift carpets, pad edges, and circulate air underneath.
Remove drywall only where it’s soft, swollen, or stained.
Carry boxes to a dry room with fans and dehumidifiers.
Photograph losses before discarding anything.
Label rescued items so your team can track them.
Work fast, but don’t rush decisions. You’re preserving what still connects your household, and every minute counts.
Keep pathways clear, wear gloves, and separate salvageable goods from contaminated debris. After transfer, inspect for odor, warping, and mold, then dry everything thoroughly and methodically.
Pull Out Wet Insulation and Ruined Materials
Start by removing any wet insulation, drywall, carpet pad, cardboard, and other porous materials that can’t dry quickly or be fully sanitized.
You should treat this insulation removal as a priority because trapped moisture supports mold and weakens framing. Cut back damaged sections to sound edges, then bag and label debris for material disposal.
If you can’t confirm a clean, dry core, pull the piece out completely. Wear gloves, a respirator, and eye protection so you stay safe while you work.
Keep contaminated items separated from salvaged belongings, and don’t stack waste against finished surfaces. Use a sturdy container or lined cart to move debris out in controlled loads.
When you work methodically, you protect your space and make the cleanup crew’s job easier.
Increase Airflow to Speed Up Drying
With the wet materials removed, you can increase airflow to accelerate evaporation and reduce the chance of mold growth. Position fans to create cross-flow across floors and walls, and keep doors open when safe.
Use dehumidifiers and other ventilation equipment to pull moisture from the air, while sealing off unused rooms so your drying effort stays focused. These air circulation techniques help you regain control fast and make the space feel less overwhelming.
- Aim fans at damp surfaces
- Space equipment so air moves freely
- Run exhaust units near exits
- Check outlets and cords for safety
- Adjust airflow as surfaces dry
You’re not rushing; you’re following a method that supports your basement and your household.
Check for Mold After Drying
Once the basement is dry, inspect every affected surface for mold growth and hidden moisture. You should check baseboards, drywall seams, insulation, floor edges, and stored items with a bright light and your nose; musty odor often signals lingering dampness.
Look for discoloration, fuzzy patches, and warped materials, and test suspicious areas with a moisture meter if you have one. If you find mold growth, clean small, nonporous surfaces promptly and discard materials that stay saturated.
Keep your findings organized so you can track affected zones and verify they’re stable. Consistent prevention methods, including ventilation, dehumidification, and rapid cleanup, help protect your space and support everyone who relies on it.
Call Water Damage Specialists for Help
If mold keeps spreading, water keeps seeping in, or the basement still smells damp after drying, you should call a water damage specialist right away. They’ll deliver emergency response, isolate the source, and perform a damage assessment before hidden moisture turns structural materials weak.
You belong in a team that acts fast and methodically, not one that guesses.
- Extract remaining water with professional-grade pumps
- Measure moisture in walls, floors, and framing
- Set targeted drying and dehumidification
- Treat contaminated surfaces safely
- Document damage for repair planning
Their tools reach voids you can’t inspect, and their reports help you decide what to salvage.
When you ask for help early, you reduce repair costs, protect indoor air, and restore your basement with confidence.
Frequently Asked Questions
How Do I Know if Basement Water Is Contaminated?
You can tell basement water’s contaminated by checking water quality and spotting contamination signs: odor, discoloration, sludge, sewage backup, oily sheen, or mold. If you see any, avoid contact and test it immediately.
Can I Use a Household Vacuum for Water Removal?
No—you shouldn’t use a household vacuum; it’ll bite off more than it can chew. You’ll exceed vacuum limitations, risking shock and damage. Instead, choose alternative solutions: wet/dry vacs, pumps, or professional extraction.
Should I Turn off Electricity Before Entering the Basement?
Yes, you should turn off electricity before entering the basement. You’ll reduce electrical hazards and follow essential safety precautions. If you can’t reach the main breaker safely, call a licensed electrician or emergency responder.
How Long Can Water Sit Before Mold Starts Growing?
Mold can start growing within 24 to 48 hours, depending on factors affecting mold like temperature, humidity, and materials. You’ll reduce risk by drying surfaces fast and controlling moisture aggressively throughout your basement.
Is It Safe to Salvage Soaked Furniture After Flooding?
You can sometimes salvage soaked furniture, but you must assess structural damage, contamination, and drying techniques fast. Use furniture restoration only after thorough cleaning, disinfection, and controlled drying; otherwise, discard it to avoid mold, odors, and instability.
Wrap-Up
If you act fast, you can stop basement water damage before it spirals into a disaster of epic proportions. Shut off the source, verify wiring and foundation safety, then remove standing water with pumps and a wet vac. Run a backup sump pump, pull out saturated materials, and increase airflow to dry the space. Afterward, check for mold and hidden moisture. If the issue persists, call water damage specialists for safe, thorough cleanup.