
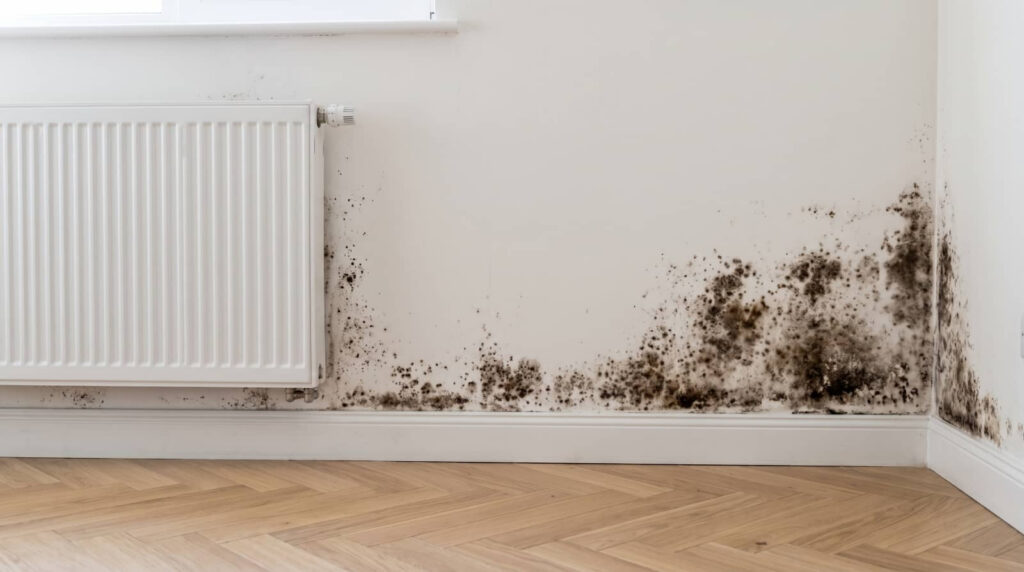
After Hurricane Harvey, many homeowners learned how quickly black mold can spread through soaked drywall, carpet, and other porous materials. Black mold removal should begin by stopping floodwater at the source, drying affected areas within 24 to 48 hours, and inspecting for hidden moisture before mold spreads further. With the right protective gear, removal methods, and disposal practices, you can reduce exposure risks and limit damage. The critical mistake, though, is assuming visible mold is the only problem.
Key Takeaways
- Stop the water source, remove standing water fast, and dry the area within 24–48 hours.
- Inspect hidden spaces for musty odors, staining, warping, and visible black, green, or gray mold.
- Wear N95 respirator, gloves, and goggles, and ventilate the area to reduce spore exposure.
- Remove and discard moldy porous materials like drywall, insulation, and carpet in sealed bags.
- Call a mold remediation professional for extensive damage, contamination, or moisture that will not dry completely.
Stop Floodwater and Dry Fast
The first 24 to 48 hours matter most: stop the floodwater at the source if you can do so safely, then begin drying the area immediately.
Shut off the main supply, isolate affected rooms, and remove standing water with a pump, wet vac, or professional water extraction service.
Open windows, run fans, and use dehumidifiers to drop humidity fast.
Pull up soaked rugs, towels, and loose furnishings so air can circulate under them.
Document damage for insurance, but don’t delay drying.
For flood prevention, check gutters, seals, and grading once the area’s safe.
You’re not dealing with this alone; follow a methodical plan and keep every surface moving toward dry.
Fast action limits structural damage and reduces conditions that favor mold growth.
Spot Visible Signs of Black Mold
Once standing water is gone and surfaces start drying, inspect for visible mold growth on porous materials, hidden cavities, and damp structural surfaces. You’ll often see black, green, or gray patches, fuzzy textures, or slimy films.
Check drywall edges, insulation faceings, baseboards, joists, and carpet backing for staining that looks uneven or spreads in rings. Trust your nose too; a persistent musty odor often confirms active mold growth even before colors stand out.
Photograph each area, note moisture levels, and mark all affected zones so you can act as a team with remediation professionals.
Because black mold can elevate health risks, avoid scrubbing dry growth and limit disturbance. Wear gloves, eye protection, and a respirator, then isolate visible contamination until proper cleanup starts.
Check Hidden Mold in Wet Materials
Even when you don’t see mold on the surface, wet materials can hide active growth behind them. You should inspect drywall, insulation, baseboards, carpet padding, and particleboard for softening, staining, and warping.
Press lightly along seams and edges; if the material feels swollen, crumbly, or cool, hidden moisture may remain inside. Use a flashlight to check behind furniture, under trim, and inside wall cavities exposed by flooding.
During material assessment, note any lingering odor, since musty smells often signal concealed colonies. If a section stays damp after ventilation, treat it as suspect and isolate it from clean areas.
This careful check helps your crew protect the space you share and guide removal choices with confidence.
Protect Yourself Before Cleanup
Before you start cleaning, put on personal protective equipment that limits inhalation and skin contact with mold and flood residue.
Wear protective gear: N95 or better respirator, goggles without vents, gloves, long sleeves, long pants, and waterproof boots. If you’re part of a cleanup team, check that each item fits snugly and covers exposed skin.
Keep doors open and use fans only if they exhaust air outdoors, so you don’t trap spores inside.
Take health precautions by removing jewelry, covering cuts, and washing hands and face after each work period. Change out of contaminated clothing before entering living spaces, and bag it for hot-water laundering.
If you feel dizzy, wheezy, or irritated, stop and reassess your setup before continuing.
Remove Black Mold Safely
Remove black mold only after the affected area has been fully dried and isolated, because moisture will keep the contamination active and spread spores during cleanup.
You should verify the growth with mold identification techniques, then keep the room sealed so you’re protecting your household’s air.
Dampen the mold lightly with approved safe cleaning products to reduce airborne particles, but don’t oversaturate the material.
Scrub with controlled pressure, and immediately collect residue in sealed bags.
If you see repeated staining, stop and reassess the source before continuing.
Work methodically, keep tools dedicated to the job, and replace contaminated wipes or sponges often.
You’re not just cleaning a surface; you’re helping restore a safer, healthier space that your family can trust.
Clean Hard Surfaces Properly
Once the area is dry and contained, you can clean hard surfaces with a systematic approach that lifts residue without driving spores deeper into the material.
Wear gloves and a respirator, then prepare detergent and water, or an approved cleaner for nonporous surface materials. Work from the outer edge inward, using disposable cloths or sponges and light pressure.
Rinse each section with clean water, then dry it completely with towels or airflow. If staining remains, repeat the cleaning techniques instead of scrubbing aggressively.
Keep your tools separated for contaminated zones, and replace solutions when they cloud.
You’re not alone in this process; careful, methodical cleaning helps your space feel safe again and supports the next step in restoration.
Throw Away Moldy Porous Materials
You should discard moldy porous materials because they absorb moisture deeply, trap spores, and can’t be reliably cleaned.
Throw away items like drywall, insulation, carpet, carpet pad, upholstered furniture, paper, and fabric that stayed wet or show visible mold.
Bag the debris, seal it before transport, and follow local disposal rules to prevent cross-contamination.
Porous Material Risks
Porous materials that have grown mold after flooding usually can’t be fully cleaned, because their open structure traps moisture and spores deep inside. You need to treat porous materials as high-risk for mold growth, even after surface washing, because hidden contamination can keep spreading.
If you’re rebuilding with your team, isolate these items quickly and inspect them under strong light.
- Drywall and ceiling tiles absorb water fast.
- Carpet padding holds dampness and odor.
- Insulation keeps spores out of reach.
You can’t verify safety by appearance alone. If the material stayed wet, warped, or soft, assume internal damage.
Act fast, document conditions, and remove exposed porous materials before you finish remediation. That choice protects your home, your crew, and the people who belong there.
Items To Discard
Toss any porous item that stayed wet long enough for mold to grow, because cleaning won’t reliably remove contamination from its interior. You should discard drywall, insulation, carpet, carpet padding, upholstered cushions, mattresses, paper goods, and particleboard that swelled or softened.
If you can’t fully dry these materials within 24 to 48 hours, mold can colonize deep fibers and voids. Treat moldy furniture as non-salvageable when the frame, stuffing, or fabric has visible growth or a persistent musty odor.
Do the same for contaminated clothing made from absorbent fabrics if stains, odor, or damp storage remain. Keep your crew aligned: if an item is soft, fibrous, or layered, assume moisture reached hidden areas and replace it rather than risking recontamination or ongoing indoor spore exposure.
Safe Disposal Steps
Start with careful containment so mold spores don’t spread during cleanup. You should bag all moldy porous materials in heavy-duty plastic, seal them tightly, and move them outside before final removal.
Follow safety guidelines by wearing gloves, an N95 respirator, eye protection, and long sleeves, then keep the area ventilated. Use approved disposal methods for drywall, insulation, carpet, cardboard, and upholstered items; these materials usually can’t be cleaned safely after flooding.
- Double-bag debris before transport.
- Label bags if local rules require it.
- Place waste at the curb or at an approved facility.
You belong with other homeowners who act quickly and methodically. After disposal, clean tools, wash hands, and inspect hidden cavities for leftover moisture.
Dry the Area Completely
After you remove the bulk of the floodwater, you need to dry every affected surface completely to stop mold from taking hold.
Use focused drying techniques that move air across walls, floors, and hidden cavities. Position high-velocity fans to create crossflow, and run dehumidifiers to support moisture control in the room and nearby spaces.
Open access panels so air reaches insulation, framing, and subfloors. Check damp materials with a meter; if readings stay elevated, keep drying.
Replace wet filters and empty collection tanks often so equipment performs consistently. You’ll protect your space and help your team work with confidence when every surface feels dry, not just looks dry.
Continue until wood, drywall, and concrete all test within normal limits.
Prevent Black Mold From Returning
To keep black mold from returning, you should seal all moisture entry points in walls, windows, roofs, and foundations.
You’ll also need to maintain dry indoor air by using dehumidifiers, fixing leaks quickly, and keeping ventilation effective.
Monitor humidity and material surfaces regularly so you can correct moisture problems before mold can regrow.
Seal Moisture Entry
Even after you clean and dry the flooded area, black mold can return if moisture keeps getting in, so you need to seal every entry point that can let water or humid air inside.
Inspect foundation cracks, pipe penetrations, and window frames, then repair them with compatible caulk, sealant, or hydraulic cement. Add moisture barriers where framing meets concrete, and install vapor retarders on the warm side of insulated assemblies to block inward vapor drive.
- Seal gaps around utility lines
- Replace damaged weatherstripping and thresholds
- Patch wall or slab cracks promptly
When you close these paths, you protect your space and help your household stay in the dry, mold-resistant community you’re rebuilding.
Maintain Dry Air
Keeping the air dry is just as important as sealing water entry, because lingering humidity can let black mold regrow on cleaned surfaces. You should keep indoor relative humidity between 30% and 60% with a dehumidifier and a calibrated hygrometer.
Run exhaust fans during showers, cooking, and laundry, and keep them on until moisture clears. Improve air circulation by opening interior doors, spacing furniture away from walls, and using fans to move stagnant air.
Replace wet filters, inspect HVAC drains, and empty condensate pans regularly. If you share a home with others, coordinate routines so everyone supports humidity control.
After storms, check basements, closets, and crawl spaces daily. Dry air helps your space stay safe, healthy, and part of the mold-free recovery crew.
Call a Mold Remediation Professional
If the flooding has spread mold beyond a small, contained area, you should call a mold remediation professional right away.
You’ll get a targeted mold inspection that maps contamination, identifies moisture sources, and checks hidden cavities. Trained crews use containment, HEPA filtration, and negative pressure to stop spore spread. They’ll also remove damaged porous materials, dry remaining structures, and verify safe humidity levels.
- Ask for licensing, insurance, and written scope.
- Request moisture readings and clearance criteria.
- Confirm the team offers full professional services.
When you work with the right specialists, you’re not facing the cleanup alone.
You’re joining a process built to restore your space safely, efficiently, and with measurable results.
Frequently Asked Questions
How Soon Should Mold Testing Begin After Flooding?
Begin mold testing within 24 to 48 hours after flooding, because mold growth can start quickly. During flood recovery, you should inspect damp materials immediately and arrange professional testing as soon as possible.
Can Bleach Kill Black Mold on All Surfaces?
No—bleach won’t kill black mold on all surfaces. You’ll remove mold from nonporous surface types, but it can’t penetrate porous materials. You should clean, dry, and replace affected materials for effective mold removal.
Is Black Mold Removal Covered by Homeowners Insurance?
Usually, you’re covered only if a covered peril caused the mold; you’ll need coverage details in your policy. File insurance claims quickly, document damage, and ask your insurer whether remediation limits or exclusions apply.
What Health Symptoms Require Immediate Medical Attention?
Seek emergency care if you develop severe shortness of breath, chest pain, wheezing, fever, confusion, or worsening coughing after mold exposure; these respiratory issues may signal an urgent reaction, and you shouldn’t wait.
How Long Does Mold Remediation Usually Take?
Usually, you’ll finish mold remediation in 1–5 days—if mold growth doesn’t act like it owns the place. Your timeline depends on damage size, drying speed, and remediation techniques, so you should inspect, contain, remove, and verify.
Wrap-Up
When you act fast after flooding, you cut mold risk dramatically—mold can begin growing in as little as 24 to 48 hours. Stop the water source, dry the area thoroughly, and remove contaminated porous materials immediately. Wear proper PPE, inspect hidden wet materials, and seal entry points to block future moisture. If contamination is widespread or you can’t fully dry the space, call a mold remediation professional to protect your health and property.