
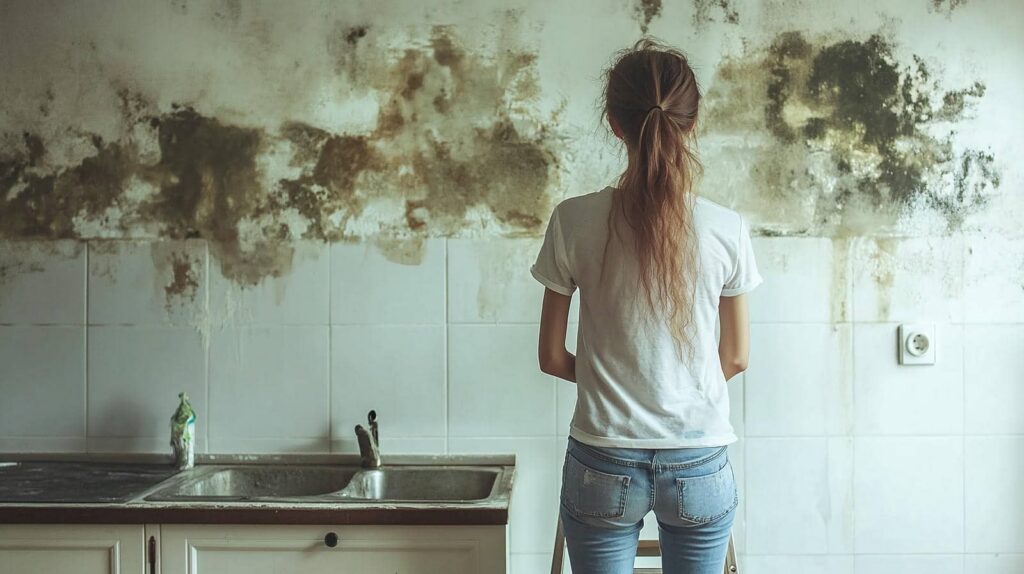
After water damage, you need to act fast because mold can begin growing within 24 to 48 hours. First, stop the leak, remove standing water, and inspect hidden areas for dampness or discoloration. Then dry the space, reduce humidity below 60%, and treat affected surfaces before spores spread. If you miss moisture or the damage is extensive, the problem can return—and the next step in mold remediation after water damage matters more than you might expect.
Key Takeaways
- Stop the water source immediately and remove standing water to prevent mold from spreading.
- Remove wet porous materials like cardboard, fabrics, and insulation that can harbor mold.
- Dry the area quickly with fans, dehumidifiers, and humidity below 60%.
- Clean hard surfaces with detergent and water, then dry them completely.
- Call a professional if mold covers more than 10 square feet or keeps returning.
Immediate Steps to Prevent Mold After Water Damage?
After water damage, you need to act fast to stop mold from developing. First, inspect the area for mold indicators such as musty odors, discoloration, and damp materials.
Then, remove wet fabrics, cardboard, and other porous items that can hold moisture. Run fans and a dehumidifier to lower humidity below 50 percent, and keep air moving through the space.
Clean hard surfaces with detergent and water, then dry them completely. Wear gloves, goggles, and a respirator if you’re disturbing debris.
These preventive measures help you protect your home and stay part of a community that values healthy, safe spaces.
Check hidden areas, including baseboards and closets, for lingering moisture. If materials stay wet after 24 to 48 hours, you’ll need professional assessment.
Stop the Leak and Remove Standing Water
Once you’ve identified moisture and protected the area from further spread, stop the source of the water immediately.
Shut off the supply valve, patch a burst line, or isolate the appliance causing damage. If you can’t find the origin, use leak detection tools or call a licensed technician so you’re not guessing.
Next, remove standing water with water extraction equipment, a wet vacuum, or mops and buckets for small areas. Work from the perimeter inward to limit spread, and empty containers often.
Keep floors clear so your crew can move safely and efficiently.
After extraction, dry surfaces with airflow and remove saturated materials you can’t salvage.
Acting quickly helps your team stay in control and reduces the conditions mold needs to establish itself.
Check for Hidden Mold and Moisture
Inspect behind walls, under flooring, and inside cabinets for hidden moisture sources after visible water is gone.
Use a moisture meter and your senses to identify damp materials, staining, or musty odors that signal concealed mold growth.
If you find elevated moisture or suspect contamination, open the area for a closer inspection and begin targeted remediation.
Hidden Moisture Sources
Even when visible surfaces seem dry, you should check for hidden moisture behind walls, under flooring, inside insulation, and around plumbing penetrations, because mold often develops where water lingers out of sight.
Use moisture detection tools to map damp readings, then trace hidden leaks at supply lines, drain joints, and window frames.
You should inspect baseboards, subfloors, attic sheathing, and crawl spaces for swelling, staining, or soft spots.
Document each area, compare readings, and isolate any source that stays elevated.
If you find a persistent wet zone, dry it with targeted airflow and dehumidification, and remove materials that won’t return to normal moisture levels.
Working methodically helps you protect your space and stay confident in the remediation process.
Concealed Mold Growth
Hidden mold growth often follows hidden moisture, so you need to verify both conditions before you begin cleanup. Use hidden detection tools and a disciplined moisture assessment to find contamination behind walls, under flooring, and inside insulation. Work as a team with your crew so no area gets overlooked.
Inspect baseboards, drywall seams, and cabinet backs.
Measure dampness with a calibrated meter.
Trace musty odors to the source.
Open suspect cavities only after documenting readings.
If you find elevated moisture, isolate the zone, improve ventilation, and remove affected materials promptly. Don’t rely on surface dryness alone; concealed growth can keep spreading.
When you confirm the full extent, you protect your space, your project, and everyone who shares it.
Why Mold Cleanup Matters After Water Damage
You need to remove mold quickly after water damage because lingering moisture lets colonies spread across drywall, framing, and insulation.
If you delay cleanup, spores can aggravate respiratory issues and trigger broader indoor air quality problems.
Prompt remediation also helps you limit structural decay, staining, and material loss.
Mold Growth Risks
After water damage, mold can begin growing within 24 to 48 hours if materials stay damp, making prompt cleanup essential. You need to assess moisture sources, because hidden wet areas let colonies spread fast.
Use these mold prevention techniques to protect your space and keep your crew aligned:
- Remove standing water immediately.
- Dry walls, floors, and insulation with airflow and dehumidification.
- Monitor environmental factors such as temperature, humidity, and ventilation.
- Discard porous materials that stay saturated.
When you act quickly, you reduce spore buildup and limit contamination in adjacent rooms.
Inspect baseboards, under sinks, and behind furniture, since mold often starts where you can’t see it. Consistent drying and verification help you regain control and keep your environment clean.
Health And Property Damage
Mold cleanup matters because damp building materials can trigger respiratory irritation, allergic reactions, and asthma flare-ups while also degrading drywall, framing, insulation, and finishes.
You need to treat these health impacts and property risks as urgent, not cosmetic. If you leave moisture in place, mold can spread through porous materials and circulate spores into occupied rooms. That can worsen symptoms for children, older adults, and anyone with allergies.
You should isolate the affected area, remove wet materials that can’t be salvaged, and dry remaining surfaces to safe moisture levels. Inspect hidden cavities, because mold often grows behind walls and under floors.
Acting quickly helps you protect your home, reduce repair costs, and keep your household safe and confident together.
Dry and Dehumidify the Area
Once the standing water is gone, dry the affected space fast to stop mold from taking hold. You should treat every hour as important and keep the room open to moving air.
Set dehumidifier settings to a low humidity target, usually 30% to 60%, and keep air circulation strong with fans aimed across wet surfaces, not directly into corners. Check progress with a hygrometer and adjust equipment as conditions change.
- Run dehumidifiers continuously.
- Keep doors and windows closed.
- Position fans to move air.
- Monitor humidity twice daily.
You’re not doing this alone; these steps help your space recover in a controlled, reliable way. Keep drying until materials feel dry and readings stay stable, then move to the next phase.
Remove Contaminated Materials Safely
When drying no longer improves the affected materials, remove anything that’s porous, swollen, or visibly mold-damaged, because these items can hold moisture and spores even after surface cleanup.
You should bag contaminated materials in thick plastic, seal each bag, and move it directly out of the work area.
Wear gloves, an N95 respirator, and eye protection so you can work confidently and protect the people around you.
Keep debris contained while you lift it, and avoid shaking or compressing it, which can release particles into the air.
For safe disposal, follow local waste rules and place removed items where they won’t re-enter the building.
If you’re managing a shared space, coordinate with your team so everyone stays informed, organized, and safe throughout cleanup.
Treat Surfaces to Kill Mold
Apply a mold-killing treatment to all hard, nonporous surfaces that remain after cleanup, using a product labeled for mold remediation and following the manufacturer’s instructions exactly.
You’ll join the work crew by targeting only exposed, cleanable materials with mold killing agents and approved surface treatments. Wear PPE, ventilate the area, and apply evenly. Let contact time match the label.
- Wipe dust first so the treatment reaches the surface.
- Saturate the area without runoff.
- Keep the product wet for the full dwell time.
- Rinse or dry only if the label says so.
Inspect corners, joints, and hardware for missed spots. Reapply if residue remains.
You’re doing precise remediation, and that discipline helps your team restore a clean, professional space.
Prevent Mold From Coming Back
To keep mold from returning, you need to eliminate the moisture source and verify that the affected area stays dry. Check plumbing, roofing, and foundation details for leaks, then repair them promptly.
Keep indoor humidity below 60% with dehumidifiers or HVAC settings, and monitor it with a hygrometer. Improve ventilation in bathrooms, kitchens, and laundry rooms so moist air exits quickly; ventilation improvement reduces condensation on cool surfaces.
After cleanup, replace porous components with mold resistant materials, such as treated drywall, insulation, and flooring products, especially where moisture exposure is likely. Insulate cold pipes and exterior walls to limit condensation.
Clean gutters, direct drainage away from the structure, and maintain airflow behind furniture. When you stay consistent, you protect your space and help everyone in it feel secure.
When to Call a Mold Remediation Specialist
Call a mold remediation specialist if the affected area is larger than about 10 square feet, if mold keeps returning after cleanup, or if you suspect hidden growth inside walls, ceilings, or HVAC components.
You’ll get faster, safer results when you act early. A qualified team should perform a mold inspection and a professional assessment before they start work.
- Verify the source of moisture.
- Isolate contaminated areas.
- Test materials and air when needed.
- Remove damaged porous items and clean remaining surfaces.
If you notice odors, recurring stains, or allergy symptoms, don’t wait. You belong in a dry, healthy space, and a specialist can help you restore it with controlled containment, proper filtration, and documented remediation.
Frequently Asked Questions
How Long Does Mold Take to Grow After Water Damage?
Mold can start growing within 24 to 48 hours after water damage. Your mold growth timeline depends on factors influencing mold like moisture, temperature, and airflow. Dry affected materials quickly so you stay protected together.
Is Mold Remediation Covered by Homeowners Insurance?
Yes, your homeowners insurance may cover mold remediation if a covered peril caused it. You should review your insurance policies, document damage, and ask about mold prevention limits, exclusions, and claim requirements promptly.
Can I Stay in My Home During Mold Removal?
Yes, you can stay during mold removal if containment is secure and you follow mold removal safety protocols; otherwise, choose temporary relocation. You’ll protect your household, avoid exposure, and stay connected through the process.
What Health Symptoms Can Mold Exposure Cause?
You can develop sneezing, coughing, wheezing, itchy eyes, skin irritation, headaches, and asthma flare-ups. Different mold types trigger varying reactions. Use prevention strategies: control moisture, ventilate spaces, and remove contaminated materials promptly to protect your household.
How Much Does Professional Mold Remediation Cost?
You’ll usually pay $500-$6,000, depending on square footage, contamination, and mold inspection costs. You should compare mold removal methods, because containment, filtration, and demolition change pricing. You’ll protect your home, and you’re not alone.
Review
You’ve seen that mold remediation after water damage starts with fast action: stop the leak, remove standing water, dry the area, and treat contaminated surfaces. Don’t skip hidden moisture checks, since mold can grow behind walls and under flooring. If you think the cleanup seems excessive, remember that delaying only raises repair costs and health risks. Keep humidity below 60%, recheck regularly, and call a specialist if mold returns or spreads.