
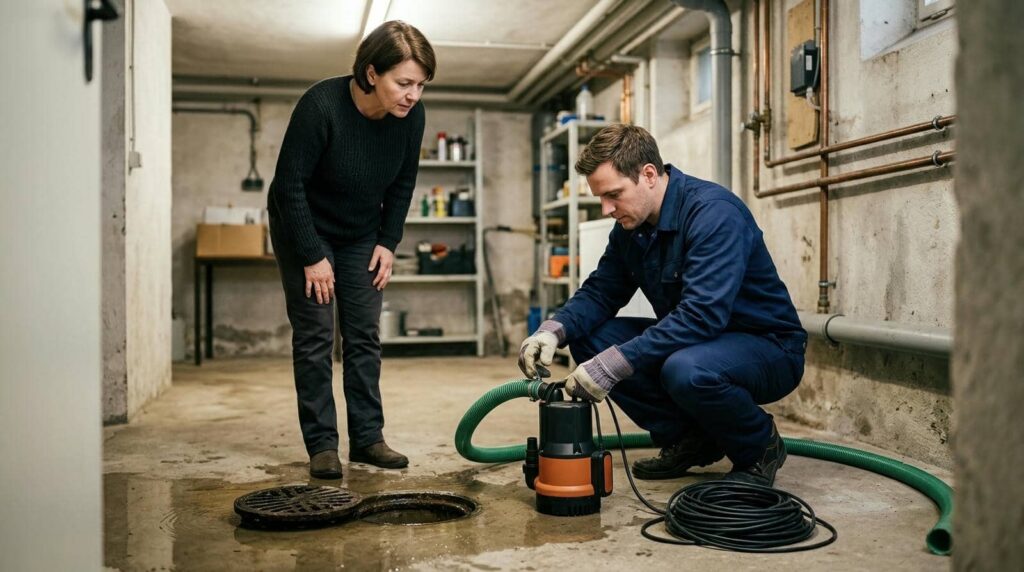
Many insurance claims involve water damage extraction, so you need to act fast when it hits your property. You’ll shut off the source, document the loss, and start extraction before moisture spreads into walls and subfloors. From there, drying, sanitizing, and mold control determine whether you’re facing a simple cleanup or a major repair—and the next step can make all the difference.
Key Takeaways
- Shut off the water source, cut power to affected areas, and wear protective gear before starting cleanup.
- Remove standing water quickly using pumps, wet vacuums, or extraction wands, working from deepest areas toward exits.
- Sort and remove wet materials, salvaging what you can and disposing of unsalvageable debris according to local rules.
- Dry and sanitize surfaces with air movers, dehumidifiers, and approved cleaners, keeping humidity below 60% to prevent mold.
- Check moisture readings before closing walls, and call a professional for large losses, contaminated water, or hidden structural moisture.
What to Do First After Water Damage?
First, shut off the water source if you can do so safely, then cut power to affected areas to reduce the risk of shock and further damage.
Next, protect yourself by wearing gloves and boots, and keep everyone out of unstable rooms. Notify your emergency contacts so they can help coordinate next steps and support you.
Document the damage with clear photos and short notes before anything changes; this record helps with insurance claims. Contact your insurer promptly and follow their reporting instructions.
Move valuables, documents, and electronics to a dry, secure area if you can do it without exposure to hazards. Ventilate the space by opening safe windows and doors.
Stay calm, act methodically, and you’ll handle the first response like part of a prepared team.
Remove Standing Water Fast
Once you’ve secured the area and reduced immediate risks, remove standing water as quickly as possible to limit structural damage and mold growth.
Use a wet vacuum, pump, or extraction wand for fast water removal, and work from the lowest point toward the exit. Keep power tools above the water line and move methodically so you don’t miss pockets under furniture edges.
- Start with the deepest pooling areas.
- Empty the extraction equipment often.
- Recheck corners, thresholds, and floor seams.
After each pass, inspect the surface for remaining sheen or seepage. Rapid extraction improves moisture control and helps you stay ahead of hidden saturation.
You’ve got this—steady, organized action protects the space and supports a cleaner recovery for everyone involved.
Remove Wet Materials and Debris
Now remove any saturated materials and loose debris that can hold moisture and slow drying. You should sort salvageable items from nonrecoverable ones, then bag and remove ruined drywall, carpet pad, insulation, and porous contents.
Use gloves and a mask to protect your crew and keep the workspace controlled. Follow wet material disposal rules for local waste streams, and seal bags before transport to limit contamination.
Manage debris systematically by grouping materials by type, marking hazardous items, and clearing pathways so everyone can work safely and efficiently. If you belong to a response team, stay aligned on disposal locations, pickup schedules, and site cleanup standards.
A disciplined debris management process reduces secondary damage, supports faster recovery, and helps your space get back to normal.
Dry Floors, Walls, and Belongings
Set up targeted drying as soon as standing water and wet debris are gone. Position air movers to push across floors and baseboards, and run dehumidifiers to support moisture control.
During water extraction, keep pathways clear so airflow reaches hidden edges and wall cavities. You’ll protect materials faster when you monitor conditions in each room and adjust equipment as needed.
- Dry floors first to limit wicking.
- Angle airflow along walls and under furniture.
- Rotate belongings so all sides dry evenly.
Check dampness with a meter, not guesswork, and move items away from cold corners where moisture lingers.
Your team can work efficiently when everyone tracks progress, records readings, and keeps the space organized. Consistent drying builds confidence and keeps restoration on pace.
Clean and Sanitize Damaged Surfaces
After surfaces are dry enough to work on, clean off any remaining soil, residue, and biofilm before applying a sanitizer or disinfectant.
Use the right detergent, warm water, and friction to lift contamination from hard, nonporous materials. Rinse fully so your surface treatments can bond evenly and work as designed.
Then apply approved sanitization methods at the label contact time, covering seams, corners, and touched areas. Keep the area ventilated and wear gloves, eye protection, and a mask if needed.
For porous items that can’t be fully cleaned, document the condition and follow your restoration plan.
You’re part of a team that values safe, orderly cleanup, so verify the surface is visibly clean and dry before returning it to service.
Prevent Mold Growth After Water Damage
Once you’ve removed standing water and cleaned the affected surfaces, you need to dry the structure quickly to prevent mold from taking hold. Use mold prevention steps that keep materials dry and airflow steady. Set up fans and dehumidifiers right away, then monitor humidity control with a hygrometer. Aim to keep indoor humidity below 60% so residual moisture doesn’t support growth.
Open interior doors and cabinets to move air through enclosed spaces.
Run dehumidifiers continuously and empty them before they overflow.
Inspect walls, flooring, and insulation for damp spots, then dry them fast.
If you stay consistent, you protect your home, support your crew, and reduce the chance of hidden moisture turning into a bigger cleanup later.
When Black Mold Removal Is Necessary
When you see visible black mold growth on walls, flooring, or concealed building materials, you need to treat it as a removal issue, not a cleanup task.
If you notice health risk signs such as respiratory irritation, persistent coughing, headaches, or allergic reactions, you should stop exposure and assess the affected area immediately.
In these cases, black mold removal isn’t optional, and you’ll need prompt remediation to limit further contamination.
Visible Mold Growth
Visible mold growth usually signals that moisture has remained long enough for fungal colonization to take hold, and you should treat it as a serious water-damage issue. You can verify the extent with mold identification techniques, then decide whether black mold removal is necessary.
Inspect porous materials, hidden cavities, and damp seams where colonies spread fastest.
- Isolate the area to limit disturbance.
- Remove wet materials that can’t be cleaned effectively.
- Dry surfaces completely and apply mold prevention strategies.
If growth covers broad areas, recurs after cleaning, or appears inside insulation, drywall, or subfloors, you’ll need professional remediation.
In a well-managed cleanup, you protect your space, keep the process controlled, and restore a healthier environment for everyone involved.
Health Risk Signs
Health risk signs can make black mold removal necessary even before you can see major structural damage. If you notice persistent mold symptoms like coughing, wheezing, nasal congestion, headaches, or eye irritation after water damage, you should treat the area as unsafe.
You may also experience worsening health effects in rooms with a musty odor, visible staining, or high humidity. If anyone in your home has asthma, allergies, or a weakened immune system, you need faster action and professional evaluation.
Don’t wait for widespread growth; hidden colonies can keep releasing spores behind walls, under flooring, and inside HVAC systems. Prompt inspection, containment, and remediation help protect your household and restore a healthier indoor environment for everyone.
Repair Floors, Walls, and Fixtures
Once the structure is dry and stable, inspect floors, walls, and fixtures for warping, delamination, cracking, staining, and hidden moisture.
You’ll restore the area by removing compromised finishes, then rebuilding in layers that match the original assembly. Work methodically:
- Replace swollen subflooring, buckled planks, or softened drywall with approved materials.
- Seal seams, patch surface defects, and verify alignment before reinstalling trim or coverings.
- Complete fixture restoration by cleaning, drying, reattaching, and testing sinks, cabinets, and hardware.
Use moisture readings to confirm each section is dry before closure.
Match fasteners, adhesives, and coatings to the substrate so repairs hold.
When you follow these steps, you keep the space safe, functional, and ready for the next phase.
When to Call a Water Damage Pro
Call a water damage pro when the affected area is larger than you can dry within 24 to 48 hours, when water has reached structural cavities, or when you suspect contaminated water, mold growth, or electrical hazards.
You need a rapid water damage assessment to confirm the source, map hidden moisture, and prevent secondary failure. If drywall, subflooring, insulation, or framing stays wet, call for restoration services right away.
You’ll protect your home and stay on the safer path with people who handle mitigation every day. Pro teams use meters, thermal imaging, extraction equipment, and controlled drying to reduce damage fast.
If you notice odors, warped materials, or repeated leaks, don’t wait. Bring in experts so you can move forward with confidence and regain a dry, healthy space.
Frequently Asked Questions
How Do I File an Insurance Claim for Water Damage?
File your claim by contacting your insurer, reporting the damage, and following the claim process. Gather photos, receipts, and notes using documentation tips. Keep communicating promptly, and you’ll protect your coverage and support your community.
What Should I Photograph Before Cleanup Starts?
Photograph every affected room, damaged belongings, standing water, stains, warped materials, and utility shutoffs before cleanup. Like mapping a storm’s path, you’ll preserve proof. Follow documentation tips, and you’ll strengthen claims while keeping your team aligned.
How Can I Tell if Water Is From Sewage or a Pipe Leak?
You can tell by odor, color, and source: sewage contamination smells foul, looks dark, and may include solids; a pipe leak is usually clear. Use leak detection to confirm, then protect yourself.
How Long Does Water Damage Extraction Usually Take?
Water damage extraction usually takes a few hours, but your drying process can take 1–5 days. You’ll see faster results with advanced water extraction techniques, surface access, and quick response from your restoration team.
What Items Can Be Saved After Flood Exposure?
You can save sealed metal, some solid wood, and certain flooded electronics if you dry them quickly. When salvaging furniture, you’ll keep structurally sound pieces; textiles, insulation, and porous items usually won’t survive.
Conclusion
You’ve got the blueprint now: move fast, pull water out, clear damaged materials, and dry every surface before mold gets a foothold. Treat each step like a chain reaction—miss one link, and damage spreads. Clean, sanitize, and repair with a careful eye, then call a water damage pro when the job’s too big or unsafe. With quick action and steady follow-through, you can turn a flooded mess into a clean, dry finish.