
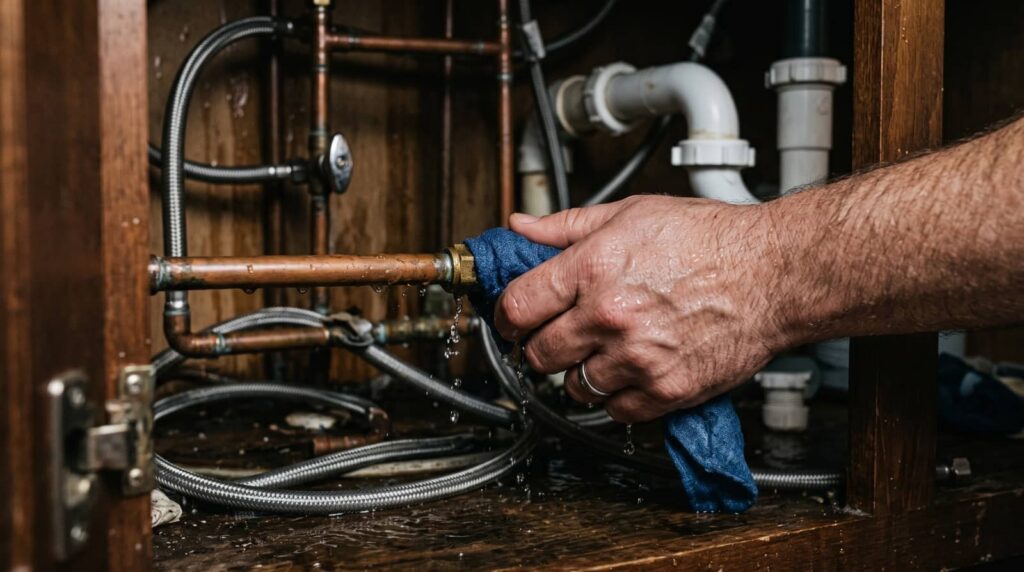
When a pipe bursts and water starts moving like a silent flood, Emergency Pipe Cleanup needs to begin as quickly as possible. Start by shutting off the water and power, then remove standing water and inspect the affected areas before the damage spreads. Gather waterproof gear, buckets, towels, a wet vac, and trash bags to help manage the cleanup safely. Protect flooring, sanitize wet surfaces, and watch closely for hidden moisture that can lead to additional damage. One missed step can make a major difference in the outcome.
Key Takeaways
- Shut off the main water supply and cut power to affected circuits before touching any wet areas.
- Remove standing water quickly with towels, pumps, or a wet vacuum, starting at low spots.
- Protect nearby belongings with plastic sheeting, and move electronics, rugs, and furniture away from the leak.
- Document all damage with photos and notes for insurance, then contact a licensed pipe repair professional.
- Improve drying with fans, open vents, and dehumidifiers, then sanitize wet surfaces using appropriate disinfectant.
Shut Off Water and Power Fast
If a pipe bursts, you need to shut off the main water supply immediately to limit flooding and protect the structure.
Then cut power to affected circuits at the breaker panel if water’s near outlets, appliances, or the furnace. You keep your team safe by treating every wet surface as energized until you verify otherwise.
In emergency preparedness, know the shutoff valve location before trouble starts, and test it during routine plumbing maintenance. If the valve sticks, use a wrench carefully, but don’t force a corroded handle.
After shutdown, label the panel and valve so everyone in your household can act fast next time. Clear communication helps you move as one unit, reduce damage, and stay in control while you wait for qualified repair support.
Remove Standing Water
Confirm the water supply stays off before you start extraction so no additional flow enters the area.
Use a wet vacuum to remove pooled water from floors, baseboards, and low spots as quickly as possible.
Then dry hidden pockets behind cabinets, under flooring edges, and inside wall cavities to limit trapped moisture and secondary damage.
Turn Off Water Supply
First, shut off the main water supply to stop additional flooding at the source. You’ll usually find the emergency shutoff valve near the meter, in a basement, utility room, or outside box. Turn the wheel or lever clockwise until it stops, then confirm no more water is entering the pipe.
If you share the line with neighbors or a unit next door, notify them quickly so everyone can protect their space.
After the flow stops, inspect the damaged area for active dripping and pooled water, and mark the wet boundary for cleanup. Keep lights on, wear slip-resistant shoes, and avoid touching electrical fixtures near moisture.
Once the water supply is secure, you and your team can move on with a safer, controlled response.
Use Wet Vacuum
Set a wet vacuum on the lowest safe setting and remove standing water from the affected area before it spreads into walls, trim, or flooring seams.
You’re taking the first controlled step in reliable cleanup techniques, and your crew can follow the same sequence. Work from the outer edge inward, overlapping each pass so you don’t leave a thin film behind.
Use wet vacuum tips that keep suction steady and avoid overfilling the tank.
- Empty the canister often to maintain performance.
- Check the hose for clogs after each room.
- Move slowly across seams and low spots.
- Stop when the surface is visibly clear.
This method reduces slip risk and gives you a clean base for the next phase.
Dry Hidden Pockets
Once the visible water is gone, dry the hidden pockets that a wet vacuum can’t reach, because moisture often lingers under trim, inside wall cavities, and in floor seams.
Remove baseboards if needed, then place fans so air moves across damp surfaces and out through openings. Use a dehumidifier to pull hidden moisture from the room, and check pipe insulation for saturation; wet insulation holds water and slows drying.
Open access panels, inspect around joints, and feel for cool, soft spots that signal trapped water. If you can safely lift flooring edges, do it to expose wet sublayers.
Keep monitoring until readings return to normal. Your crew can’t finish the job until every concealed pocket is dry, stable, and ready for cleanup completion.
Check the Burst Pipe Damage
Inspect the burst pipe and surrounding area for visible damage, including cracks, splits, loose fittings, soaked insulation, warped materials, and signs of water migration into walls, floors, or ceilings.
Use pipe inspection techniques to trace the failure point, then apply damage assessment methods to judge severity without guessing. Stay methodical so you and your crew act like a solid team.
- Mark every damaged surface.
- Note discoloration, swelling, and residue.
- Check adjacent joints for stress.
- Record what’s worsening fast.
This quick scan helps you spot hidden risk and keeps your response focused.
When you document the exact condition, you protect the space, reduce uncertainty, and build confidence that you’re handling the emergency together.
Gather Cleanup Supplies
Put on gloves and boots before you enter the wet area to protect your hands and feet from contamination and sharp debris.
Set out towels and buckets to absorb standing water and collect runoff quickly.
Keep trash bags ready so you can remove soaked materials without delaying cleanup.
Gloves And Boots
Before you touch any wet debris or sharp pipe fragments, slip on a sturdy pair of waterproof gloves and boots to protect your hands and feet from contamination, cuts, and slips.
Choose gear that fits snugly, because loose cuffs can catch on edges and slow your response. For safety precautions, inspect the material types: nitrile, neoprene, or rubber gloves resist moisture differently, and boots should have treaded soles and puncture resistance.
Your team counts on you to reduce exposure and keep the cleanup controlled.
- Check for tears before entry.
- Pull gloves over sleeves.
- Tighten boot tops around pant legs.
- Replace damaged gear immediately.
When you suit up correctly, you belong to the crew that handles the mess with confidence, precision, and less risk.
Towels And Buckets
Grab at least three clean towels and two sturdy buckets so you can absorb water, catch debris, and move contaminated material without spreading it.
Choose towel types with high absorbency, low lint, and enough surface area to handle repeated wringing. Keep one towel for soaking, one for wiping fixtures, and one reserved for drier surfaces, so you stay organized as a team.
Select bucket sizes that match the spill: a smaller bucket lets you maneuver in tight spaces, while a larger one handles heavier runoff.
Inspect each item for cracks, frayed edges, or weak handles before you start.
When you gather these supplies together, you work faster, reduce mess, and protect the rest of the space with confidence and control.
Trash Bags Ready
Keep several heavy-duty trash bags on hand so you can isolate wet debris, contaminated rags, and broken material without letting it spread. You’ll move faster when your cleanup station is organized and your team feels ready.
Line a bucket or bin with a bag, then replace it before it tears. Use double-bagging for sharp fragments and saturated waste.
- Tie off bags as soon as they’re half full.
- Keep one bag for solids and one for soaked items.
- Label waste if local rules require separate disposal.
- Store filled bags away from foot traffic.
These trash disposal tips and bagging techniques reduce leaks, protect surfaces, and help you maintain control during a stressful pipe emergency.
Protect Floors and Belongings
If water is spreading from the pipe, move quickly to shield nearby surfaces and items from damage. Place plastic sheeting, towels, or a waterproof mat under the leak zone for floor protection.
Move rugs, electronics, paper files, and furniture away from the splash path so your belongings’ safety stays intact. If you can’t relocate heavy pieces, lift their legs onto blocks or wrap the bases with absorbent material.
Keep cardboard and fabric out of the wet area; they wick water fast. Use tape or weights to hold coverings in place, but don’t seal anything against the pipe.
You’re not alone in this mess—steady, organized action protects your space and makes cleanup easier for everyone involved.
Dry the Pipe Area Thoroughly
Remove any standing water around the pipe immediately with towels, a wet vac, or a pump.
Then increase air circulation with fans and open vents to speed evaporation from the area.
Finally, check behind walls, under insulation, and along baseboards for hidden moisture so you can dry it before mold starts.
Remove Standing Water
Start by extracting every bit of standing water around the pipe so the area can dry quickly and safely. Use towels, a wet vac, or a pump for fast water removal, and guide runoff toward temporary drainage solutions. You’re protecting the surface, the pipe, and your team’s next steps.
- Check low spots first; hidden puddles keep materials saturated.
- Squeegee water from edges to the collection point.
- Empty recovery containers often to maintain suction.
- Inspect the floor and pipe base until no sheen remains.
Work methodically and keep the zone contained. When you clear every puddle, you reduce slip risk, limit seepage, and give your crew a clean, controlled space to continue.
Improve Air Circulation
Once you’ve cleared the standing water, bring in fans, air movers, and, if needed, a dehumidifier to keep air moving across the pipe and surrounding materials.
Position each unit to create crossflow, and keep doors open when it’s safe so your setup works as a system. If your space already has ventilation systems, run them continuously to accelerate evaporation.
Use air purifiers only if the air feels stale; they help circulate cleaner air, but they don’t replace drying equipment.
Check that vents, registers, and cabinet openings aren’t blocked, because tight spaces hold moisture longer.
You’re building a dry, stable environment that supports the rest of the cleanup. Stay consistent, monitor airflow, and let every surface dry evenly so your team can move forward with confidence.
Check Hidden Moisture
Check hidden moisture with a meter or thermal camera, especially around baseboards, cabinet bottoms, wall cavities, and the underside of flooring where water can linger after the visible surface dries.
You need moisture detection to verify the area’s real condition, not just its appearance. That protects your home and your crew from hidden damage. Use a systematic sweep, then log readings and retest until levels stabilize.
- Feel safer knowing you caught what eyes miss.
- Avoid warped materials and trapped odors.
- Support mold prevention before spores gain a foothold.
- Rejoin the space with confidence, not doubt.
If readings stay elevated, open access points and dry longer. Precision now saves you from bigger repairs later.
Sanitize Wet Surfaces
As soon as you’ve removed the standing water, sanitize every wet surface to reduce the risk of mold, mildew, and bacterial growth.
Choose sanitize methods that match the material: use nonabrasive cloths for painted walls, sealed tile, and metal fixtures, and avoid oversaturating porous trim.
Apply surface disinfectants exactly as labeled, keeping the full contact time so they can work effectively.
You’ll protect your cleanup crew and keep your space safer when you wipe from cleaner areas toward dirtier ones, changing cloths when they become visibly soiled.
Wear gloves and maintain good airflow while you work.
If you’re part of a tight team, share the same process for each room so everyone stays aligned, efficient, and confident during the cleanup.
Watch for Hidden Moisture and Mold
Even after visible water is gone and surfaces are sanitized, moisture can stay trapped where you can’t see it. You need moisture detection to catch damp drywall, subfloors, insulation, and cavities before mold starts.
Use a meter, inspect baseboards, and feel for cool, musty spots. For mold prevention, keep air moving and remove soaked materials quickly.
Watch closely for:
- Soft, swollen trim
- Discolored paint or bubbling finish
- Persistent humidity readings
- Earthy odors after drying
If you spot any of these, act fast so your crew stays safe and your space feels like home again.
Hidden moisture can spread damage quietly, so trust your tools and your instincts. You’re not overreacting—you’re protecting everyone who belongs there.
Document the Damage for Insurance
Before you remove or replace anything, document the damage thoroughly for your insurance claim.
Take wide photos of every affected room, then close-ups of warped flooring, stained drywall, soaked insulation, and damaged belongings. Record date, time, and the pipe source if you can identify it.
Keep a simple damage assessment log with item descriptions, estimated value, and visible condition. Save receipts for temporary supplies, cleanup materials, and any emergency services.
If water has spread, mark the perimeter with tape so your evidence stays organized. Back up images to cloud storage and email copies to yourself.
Clear records strengthen insurance claims, speed review, and help you speak confidently with your adjuster. Stay methodical, because your careful documentation protects your home and your household.
Call a Burst Pipe Repair Pro
Once you’ve documented the damage, call a licensed burst pipe repair pro to stop the leak and prevent further structural or mold damage. You’ll get fast pipe repair, correct diagnostics, and code-compliant materials that protect your home and your crew.
In emergency preparedness, speed matters, but precision matters more.
- Shut off water at the main.
- Clear access to the break.
- Confirm the pro’s license and insurance.
- Ask for moisture checks after repair.
You’re not handling this alone; you’re joining homeowners who act early and avoid costly secondary losses.
A qualified technician can isolate pressure, replace failed sections, and verify system integrity. That’s how you restore safety, reduce stress, and get back to normal with confidence.
Frequently Asked Questions
How Do I Know if My Insurance Covers Pipe Cleanup Costs?
Check your policy’s declarations and exclusions for pipe insurance and cleanup coverage. You’ll usually call your insurer, ask if sudden water damage qualifies, and verify deductibles, limits, and required documentation before filing.
Can I Safely Use a Regular Fan for Drying Wet Pipe Areas?
Yes, you can use a regular fan, but you’ll get limited fan efficiency. For wet pipe areas, you should combine drying techniques, improve airflow, and monitor moisture so you’re drying thoroughly and safely.
What Cleaning Products Are Safe for Sanitizing After a Pipe Burst?
You can use safe disinfectants, like a surgeon’s scalpel, to tackle a pipe burst. Choose EPA-approved cleaning solutions, sanitize surfaces after water damage, and follow the restoration process carefully so you don’t spread contamination.
Should I Discard Food and Medicine Exposed to Pipe Water?
Yes—discard exposed food and medicine if pipe water touched them, especially with water contamination concerns. You’ll protect food safety by throwing out porous, sealed-damaged, or refrigerated items, and by checking labels, expiry dates, and pharmacist guidance.
How Long Does Mold Typically Take to Appear After Flooding?
Mold can appear within 24 to 48 hours after flooding, like an uninvited roommate in your damp kingdom. You’ll want to dry everything fast; mold growth follows flood damage when moisture lingers.
Review
When a pipe bursts, you need to act like a locked valve in a storm: shut off water and power, remove standing water, and check the damage fast. Use the right cleanup gear, protect your floors and belongings, and sanitize every wet surface. Keep watching for hidden moisture and mold, document everything for insurance, and call a pro. These steps don’t just dry a room—they seal the breach and keep your home stable.