
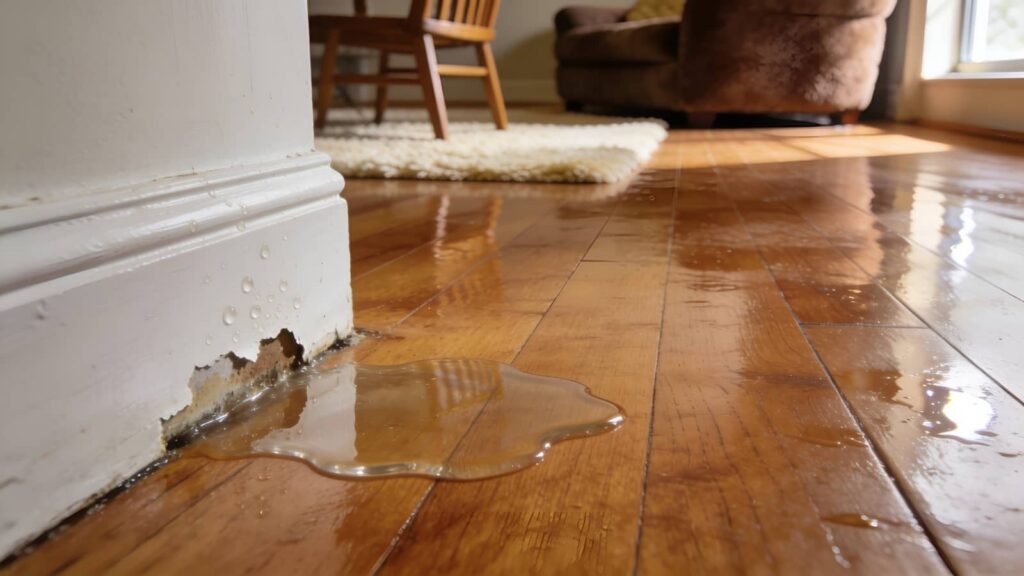
When a pipe rupture sends water rushing through your walls, you need to act fast. Shut off the main water supply, cut power to the affected area if it is safe to do so, and alert everyone in the home. Then remove standing water with a wet/dry vacuum or sump pump, improve ventilation, and begin drying the space. Check hidden areas for trapped moisture, especially behind walls and under flooring. If the damage has spread, document everything and contact a water damage professional before moisture leads to mold or more extensive structural damage.
Key Takeaways
- Shut off the main water supply immediately and close any nearby fixture isolation valves.
- Cut power to affected areas safely, avoiding standing water and using flashlights instead of candles.
- Remove water quickly with a wet/dry vacuum, sump pump, or buckets, working from low areas outward.
- Dry the area thoroughly with fans, dehumidifiers, and open ventilation to prevent mold and hidden moisture.
- Photograph damage, save receipts, and call a water damage professional if the rupture caused significant damage.
Stop the Water at the Source
If you can do so safely, shut off the main water supply immediately to stop the rupture from feeding more water into the system.
Locate the main valve ahead of time, and teach everyone in your household where it sits. If the leak starts near a fixture, close that fixture’s isolation valve too.
Keep a wrench, flashlight, and towels in your emergency kit so you can act fast without searching.
After the flow stops, inspect the visible piping for cracks, bulges, or loose joints, but don’t force damaged parts. Document the damaged area with photos for your plumber.
Regular pipe inspection helps you spot weak points before they fail, and it gives your home team a better chance to respond quickly, stay organized, and protect the rest of the house.
Shut Off Power and Stay Safe
Once the water is off, cut power to any affected area if you can reach the breaker panel without stepping through standing water.
If the panel’s path is wet, stay back and call an electrician or utility provider.
Unplug nearby electronics only when your hands and floor are dry, and never use a cord that’s submerged or damaged.
Put on safety equipment such as insulated gloves and rubber-soled shoes if you have to enter a damp space.
Keep flashlights ready, not candles, so you can move without adding fire risk.
This is basic emergency preparedness: secure electricity first, then assess the room.
Stay with your household, communicate clearly, and don’t rush into flooded areas.
You’ll protect yourself, your crew, and your home.
Remove Standing Water Fast
Pull standing water out as quickly as you can to limit soaking, swelling, and mold growth. Use a wet/dry vacuum, sump pump, or buckets for quick removal, and work from the lowest area toward the drain or doorway.
Keep hoses and cords clear so you can move safely and maintain steady suction. If the spill is deep, remove water in stages to avoid overloading equipment. Empty containers before they fill, and watch for hidden pockets around baseboards and under furniture legs.
Wear gloves and boots, because you’re handling contaminated water and debris. As you clear standing water, check that the floor remains stable and that no new leaks are feeding the area.
Fast action helps your home recover with you, not against you.
Dry Walls, Floors, and Hidden Spaces
After you remove standing water, dry wall cavities with targeted airflow and dehumidification to prevent trapped moisture from spreading.
You should pull up wet floor coverings, extract moisture from subfloors, and monitor readings until the materials stabilize.
Open hidden spaces, such as cabinets and wall voids, so air can circulate freely and reduce the risk of mold growth.
Wall Cavity Drying
A few inches of standing water can soak far beyond what you see, so you need to dry the wall cavity, subfloor, and other hidden spaces as soon as the main water source is shut off.
Open baseboards and access points, then inspect wall insulation for saturation. Pull wet insulation if it’s damaged, because trapped moisture slows drying and feeds mold.
Use drying techniques that move air through the cavity, such as low-profile air movers and dehumidifiers positioned outside the opening. Keep the room closed, monitor humidity, and check framing with a moisture meter until readings stabilize.
Work methodically, and you’ll protect the structure, reduce odors, and stay aligned with a crew that knows quick response matters. If you’re unsure, call a water-damage pro.
Floor Moisture Removal
Start floor moisture removal by extracting pooled water from carpet, padding, hardwood, and the subfloor before it can migrate into joints and seams.
You should keep checking with moisture detection tools to verify that the surface and underlayment are dropping to safe levels.
Lift rugs, baseboards, and loose thresholds so you can dry edges that trap water.
Use controlled heat and dehumidification to reduce dampness without warping wood or breaking adhesive bonds.
If you find cupping, swelling, or soft spots, document them before applying floor treatments or repairs.
Wipe away residue, then retest until readings stay stable.
When you work methodically, you protect the structure and join the group of homeowners who stop hidden damage early.
Hidden Space Airflow
Once the visible floor water is gone, you need to move air into the cavities where moisture still hides behind walls, under flooring, and inside closed spaces.
Pull baseboards, open access panels, and drill small relief holes where needed so air can reach trapped zones. Position fans to create cross-flow, and pair them with dehumidifiers to keep humidity low.
Use proven ventilation techniques like directed exhaust and return-air balancing to improve air circulation through wall cavities and subfloors.
Check insulation, framing, and drywall for dampness with a moisture meter, and keep drying until readings stabilize.
You’re not alone in this cleanup; careful airflow helps protect your space, your structure, and your peace of mind while you restore a safe, dry home.
Prevent Mold After a Burst Pipe
To prevent mold after a burst pipe, you need to dry all affected areas as fast as possible, using fans, dehumidifiers, and ventilation.
Remove any damp materials that can’t be fully dried, such as insulation, drywall, carpet padding, and soaked debris.
The sooner you eliminate moisture and contaminated porous items, the lower your risk of mold growth.
Dry Affected Areas Fast
Pull moisture out of the space as quickly as possible to slow mold growth after a burst pipe. You’ll protect the room by pairing dehumidifier usage with targeted ventilation techniques.
Set the unit in the dampest area, close windows if outside air is humid, and keep doors open between connected rooms so air can circulate. Run fans to move surface moisture toward the dehumidifier, but don’t aim them at hidden cavities where airflow can spread contamination.
Check humidity with a meter and keep it below 60% if you can. Inspect baseboards, drywall edges, and flooring seams for lingering dampness, then continue drying until readings stabilize.
Acting fast helps your home feel safer, and you’re keeping your team focused on recovery.
Remove Damp Materials
If materials stay damp after a pipe rupture, remove them quickly so mold has less time to develop.
Pull up wet carpet, pad, and baseboards, then bag porous items that can’t dry fully. You should follow safe damp material disposal practices: seal debris in heavy-duty bags and move it out of the home fast.
Check insulation, drywall, and ceiling tiles for soft spots, staining, or odor; if they’ve wicked water, replace them.
Use moisture absorption techniques like desiccant packs, towels, and air movement only on salvageable items.
Keep the space organized so you and your household can work together efficiently.
Wear gloves and a mask, and inspect hidden cavities after removal.
Clean the exposed framing, then continue drying until moisture readings return to normal.
Save Damaged Contents Before They Warp
Act quickly to remove wet items before they swell, stain, or delaminate. You’ll protect more when you sort by material and moisture level, then salvage belongings you can dry safely.
First, assess damage: separate paper, textiles, wood, electronics, and sentimental items, and move each to a clean, stable surface. Blot surfaces with lint-free cloths, then use fans and dehumidifiers to speed evaporation without forcing heat onto fragile items.
Stand books upright and interleave absorbent paper. Lay photos flat, face up, on wax paper. Keep coated furniture off wet flooring and place foil or blocks under legs.
Bag saturated debris immediately, and label saved items so your team can track what needs cleaning, drying, or professional restoration.
Check Attics and Crawlspaces for Moisture
Once you’ve removed the wet contents, inspect the attic and crawlspace for hidden moisture so damage doesn’t keep spreading. You’re part of a group that acts fast, and that matters here.
Use a flashlight and moisture meter for moisture detection, then trace damp framing, subfloor, and sheathing.
- Check joists and rafters for dark staining.
- Feel insulation for clumping or cool, damp spots.
- Inspect vents, vapor barriers, and pipe runs for active seepage.
- Mark wet areas so you can dry them efficiently.
Make insulation checks along perimeter walls and around penetrations, because trapped water can linger there.
Keep air moving, but don’t ignore hidden pockets under low spots. If you find recurring dampness, you’re not alone—recheck after a few hours and confirm the source is fully isolated.
Clean and Disinfect Affected Surfaces
After you’ve confirmed the area is dry enough to work, clean all affected surfaces with warm water and a detergent to remove mud, residue, and loose debris.
Use clean cloths or soft brushes so you don’t spread contaminants into nearby areas. Rinse each section with fresh water, then dry it with towels or airflow before moving on.
For porous materials, scrub gently and replace anything that stays stained, warped, or soft.
Next, apply approved disinfection methods exactly as labeled, keeping surfaces wet for the required contact time. Focus on floors, baseboards, framing, and fixtures that touched the water.
Wear gloves, eye protection, and closed shoes throughout.
These cleaning techniques help you reset the space safely and keep your household working together toward a healthy recovery.
Call a Water Damage Pro Early
If the rupture was significant, or water reached walls, flooring, insulation, or electrical systems, you should call a water damage professional as early as possible.
They’ll assess moisture, stop hidden spread, and protect your home’s structure before mold starts. Ask for emergency services if water is still moving or safety’s compromised.
- Document damage with photos before cleanup changes evidence.
- Request moisture mapping and structural drying right away.
- Save invoices and reports for insurance claims.
- Coordinate with the pro so you and your household stay informed.
A qualified crew can also isolate affected areas, monitor drying, and help you avoid costly mistakes.
When you act early, you’re not alone—you’re joining the homeowners who’ve already protected their space with fast, informed action.
Frequently Asked Questions
How Do I Tell if the Pipe Rupture Is Covered by Insurance?
Check your insurance policy for sudden, accidental water damage coverage and exclusions for neglect or wear. Then review coverage limits, document the rupture, and call your insurer to confirm your claim eligibility today.
Should I Document Damage Before Cleanup Starts?
Yes—you should document damage before cleanup starts. Photograph everything, note dates, and record affected materials for accurate damage assessment. Then choose cleanup strategies that preserve evidence and help you feel confident, supported, and organized.
When Is It Safe to Use Tap Water Again?
You can use tap water again only after authorities clear it and you’ve flushed lines; 1 in 4 boil advisories follow pipe rupture guidelines. Test tap water safety, then run cold taps until clear.
How Long Does a Burst Pipe Repair Usually Take?
You’ll usually wait two to six hours for a burst pipe repair, depending on access, pipe size, and damage. Emergency plumbing teams inspect, shut off water, replace sections, test pressure, and finish the repair process fast.
Can I Stay Home During Water Damage Restoration?
Yes, you can stay home during water damage restoration if technicians secure home safety. The restoration process may involve drying, demolition, and air filtration; if you’re comfortable and informed, you’ll feel like part of the team.
Review
In the end, you can keep a burst pipe from turning your home into a flooded stage by acting fast and methodically. Shut off the water, cut the power, and remove standing water before it spreads. Then dry, clean, and disinfect every affected surface, including hidden spaces. Watch for mold, save damaged contents, and call a pro if needed. Like a storm passing, quick action leaves less behind to repair.