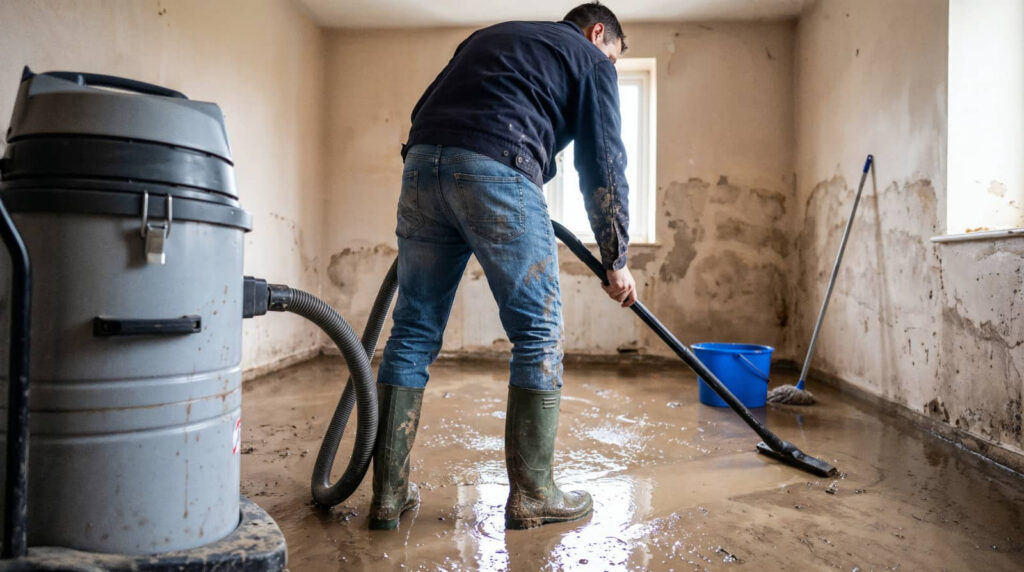
After a basement leak, you might think the visible water is the real problem, but it’s often just the beginning. Professional structural drying removes hidden moisture from drywall, framing, and insulation using controlled airflow, heat, and dehumidification. You’ll need fast action and precise monitoring to stop rot, mold, and warping before they spread. The methods look simple, but the difference between dry and “apparently dry” can change everything.
Key Takeaways
- Professional structural drying is the controlled removal of moisture from building materials after water damage.
- It targets hidden wetness in drywall, framing, subfloors, insulation, and other structural components.
- Professionals use air movers, dehumidifiers, extraction tools, and moisture meters to speed drying and verify results.
- The process manages airflow, temperature, and humidity to prevent mold, corrosion, and structural deterioration.
- Fast, monitored drying helps restore safe indoor conditions and reduces repair time and damage.
What Is Structural Drying?
Structural drying is the controlled process of removing moisture from building materials and assemblies after a water intrusion. You use it to protect structural integrity and limit secondary damage.
It’s not just surface cleanup; the drying process targets hidden moisture in drywall, framing, subflooring, and insulation. You need measured moisture readings, airflow, temperature control, and humidity management to bring materials back to acceptable levels.
When you act quickly, you help keep your property safer, cleaner, and more stable. A proper structural drying plan gives you a clear path forward, reduces downtime, and supports a healthier indoor environment.
If you’re facing moisture exposure, you’re not alone—trained professionals can guide you through each step with confidence and precision.
How Structural Drying Works After a Flood
After a flood, you have to move fast because standing water, soaked materials, and high indoor humidity keep damage spreading long after the visible water is gone.
You then map the wet areas, set moisture readings, and choose drying techniques that fit the structure. Air movers push evaporation from floors, walls, and framing, while dehumidifiers pull that vapor out of the air so materials can release more moisture.
You also isolate affected rooms to control airflow and prevent damp air from cycling back. In the flood aftermath, you check hidden cavities, baseboards, and insulation because trapped water lingers there.
As the space dries, you track progress against target moisture levels and adjust equipment until wood, drywall, and finishes return to safe conditions.
Why Fast Water Removal Matters
The sooner you remove water, the less time it has to soak deeper into flooring, drywall, insulation, and framing. You limit water damage before it spreads, weakens materials, and traps moisture in hidden cavities.
Fast action also protects your restoration timeline, because each hour of delay can add drying time, cleanup steps, and repair costs. When you respond quickly, you give your home a better chance to dry evenly and return to normal sooner.
You’re not just stopping a mess; you’re protecting the structure your family relies on and keeping the recovery process under control. That speed matters because damp materials can keep absorbing moisture, making the job harder and the outcome less predictable.
What Equipment Professionals Use
You use air movers and fans to push airflow across wet materials, speeding evaporation and reducing drying time.
You pair dehumidifiers with extraction equipment to pull moisture out of the air and remove standing water from the structure.
You also rely on moisture meters and monitors to track progress, verify hidden dampness, and confirm when the building is truly dry.
Air Movers And Fans
Air movers push high-velocity air across wet surfaces to speed evaporation and keep moisture from lingering in carpets, padding, subfloors, and wall cavities.
You place them to create strong air circulation along the wettest materials, not to blast randomly. In professional drying techniques, you angle the fans to lift boundary-layer moisture and drive it toward the room’s airspace, helping every exposed surface dry more evenly.
You’ll often see low-profile units under furniture, axial fans in open areas, and focused airflow in tight cavities. When you use the right pattern, you shorten dry times and reduce hidden damp spots.
That means your crew works as one, following a proven plan that keeps the structure stable and the job moving forward.
Dehumidifiers And Extraction
After airflow starts moving moisture off surfaces, dehumidifiers and extraction equipment take over by removing that moisture from the air and from materials that still hold water.
You’ll use dehumidifier types such as refrigerant, low-grain refrigerant, and desiccant units based on temperature, humidity, and the drying target. Each one pulls vapor efficiently when you match it to the loss condition.
For wet carpet, pad, hardwood, or structural cavities, you’ll rely on extraction methods like weighted extraction, wand extraction, and subfloor extraction to remove trapped water fast.
The goal is simple: lower moisture load, speed evaporation, and protect materials from secondary damage.
When you choose the right tools and run them together, you work like the pros and stay on track.
Moisture Meters And Monitors
Moisture meters and monitoring equipment tell you where water remains, how deep it’s traveled, and whether drying is actually progressing.
You use pin meters for direct readings in wood and drywall, and noninvasive meters for fast moisture assessment across larger areas.
Hygrometers track relative humidity and temperature, helping you judge evaporation rates and adjust airflow.
Thermal imaging can reveal hidden damp zones, but you verify every suspect area with a meter.
Good technicians document baseline readings, compare daily changes, and keep equipment calibration current so your data stays reliable.
When you read the structure correctly, you protect the build, speed drying, and work with confidence alongside your team.
How Professionals Measure Moisture
You use moisture meters to quantify how much water remains in materials, and you choose between pin and pinless types based on the surface and depth you need to assess.
These tools help you compare readings across drywall, wood, and subflooring so you can track drying progress accurately.
You also scan for hidden moisture behind walls and under flooring to catch trapped water before it causes secondary damage.
Moisture Meter Types
When professional drying starts, technicians use moisture meters to verify where water has traveled and whether materials have returned to safe levels.
You’ll usually see two main types: pin meters and pinless meters. Pin meters read resistance through probes, giving direct moisture measurement in wood, drywall, and other materials.
Pinless meters scan a wider area without making holes, which helps you compare drying progress fast. You need meter calibration to keep readings reliable, especially when you switch between material types.
In practice, you match the meter to the surface, record baseline readings, and retest at the same points. That routine lets your team speak the same technical language, track drying accurately, and make confident decisions without guessing.
Hidden Moisture Detection
Hidden moisture often hides beyond the surface, so technicians combine meter readings, thermal imaging, and controlled inspection to pinpoint where water has migrated.
You’ll see them compare drywall, trim, and subfloor data to expose hidden leaks before damage spreads. They trace patterns, confirm source points, and build moisture mapping that shows which materials still hold water and which have dried.
You benefit from this method because it removes guesswork and keeps your project on track.
Professionals also check cavities, insulation, and framing with pin and noninvasive meters, then recheck after drying steps. That steady verification helps your team stay aligned, protect structure, and avoid premature rebuilds.
Clear readings mean smarter decisions, faster drying, and fewer surprises later on.
Common Problems During Structural Drying
During structural drying, several issues can slow progress and compromise results, including trapped moisture in wall cavities, uneven airflow, high ambient humidity, and materials that dry at different rates.
You need to monitor each zone closely so moisture doesn’t linger behind finishes. Poor air movement creates pockets that resist drying, while saturated insulation and dense materials hold water longer than drywall or trim.
If you ignore these differences, you can weaken structural integrity and extend restoration time. Use targeted drying techniques, verify readings with meters, and adjust equipment placement as conditions change.
You’re not dealing with guesswork; you’re managing a system. When you track pressure, temperature, and moisture levels, you stay in control and keep the process efficient, predictable, and aligned with your team’s standards.
When to Call a Water Damage Team
Call a water damage team as soon as you see saturation that reaches subfloors, wall cavities, insulation, or structural framing, because delays let moisture migrate and increase the risk of mold, corrosion, and material failure.
You should also call when water damage follows a burst pipe, roof leak, sewage backup, or flood, or when materials stay wet after 24 hours.
A qualified crew brings emergency response equipment, moisture meters, air movers, dehumidifiers, and containment, so your home can dry to target levels.
If you notice warped flooring, musty odors, peeling paint, or dark staining, don’t wait for symptoms to worsen. Acting fast helps your space recover cleanly and keeps you connected to a team that knows how to protect your structure and belongings.
Frequently Asked Questions
How Long Does Professional Structural Drying Usually Take?
You’ll usually need three to five days, though severe damage can take longer. You’ll use drying techniques and drying equipment to speed results, monitor moisture, and restore materials efficiently, safely, and with confidence.
Is Structural Drying Covered by Homeowners Insurance?
Usually, yes—your homeowners policy may cover structural drying after sudden water damage, but you’ll need to check coverage options and file insurance claims promptly. You’re not alone; policies vary, so verify exclusions, deductibles, and limits.
Can Mold Grow During Professional Drying?
Yes, mold can grow during professional drying if you leave materials wet or airflow’s poor. You can prevent it with disciplined mold prevention, precise drying techniques, and regular moisture monitoring that keeps your space protected and included.
Should I Leave My HVAC System Running During Drying?
You shouldn’t leave your HVAC system running unless a technician approves it; it can blast moisture everywhere like a storm. Controlled drying techniques protect HVAC efficiency, speed drying, and help you feel confident you’re doing it right.
Do I Need to Move Out During Structural Drying?
Not always, but you might need temporary relocation if safety concerns exist, like mold, electrical risks, or major demolition. You can often stay if technicians isolate affected areas and keep equipment, access, and air quality controlled.
Conclusion
Professional structural drying helps you remove hidden moisture before it turns into warped framing, swollen drywall, or mold growth. When you act fast, technicians use air movers, dehumidifiers, and moisture meters to dry the structure, not just the surface. You might think the damage looks minor, but water often spreads behind walls and under floors. If you want to protect your building and avoid costly repairs, call a water damage team right away.