When you face water damage, fast structural drying isn’t just cleanup—it’s a controlled process that limits loss and reduces microbial risk. You need to stop the source, extract standing water, and place drying equipment where airflow and humidity can do the most work. The real challenge often hides inside wall cavities and structural materials, where moisture can linger long after the surface looks dry.
Key Takeaways
- Shut off the water source, isolate the area, and remove standing water immediately with pumps or wet vacuums.
- Use air movers and dehumidifiers together to create strong airflow and controlled moisture removal.
- Assess saturation with calibrated moisture meters and thermal imaging to find hidden water in walls and cavities.
- Monitor temperature, humidity, and moisture readings daily to track drying progress and prevent mold growth.
- Delay repairs until materials reach safe moisture levels and airflow conditions stabilize.
How Fast Structural Drying Works
Fast structural drying works by rapidly removing moisture from building materials before it can spread, degrade finishes, or support microbial growth.
You use controlled airflow, dehumidification, and temperature management to accelerate rapid evaporation from surfaces and hidden cavities.
Trained technicians assess saturation levels, then position equipment to create balanced pressure and consistent moisture migration.
Advanced techniques, such as targeted wall cavity drying and thermal imaging, help you locate trapped water without unnecessary demolition.
As moisture content drops, materials stabilize, odors lessen, and you reduce the risk of secondary damage.
You also gain clearer documentation of progress, which supports coordinated recovery efforts.
This method keeps you aligned with a professional restoration team and helps your property return to safe, usable condition efficiently.
Stop Water Damage From Spreading
Act quickly to stop water damage from spreading by isolating the affected area, shutting off the source if it’s still active, and removing standing water before it migrates into adjacent materials.
You should protect the rest of your property by closing doors, placing barriers at thresholds, and limiting traffic through wet zones.
In an emergency response, you’ll reduce wicking into drywall, trim, and subfloor assemblies when you contain moisture at the perimeter.
Use towels, absorbent pads, and a wet vacuum to control runoff, then inspect nearby rooms for hidden seepage.
This disciplined approach supports water damage prevention and helps your team restore the space with confidence.
Remove Standing Water Quickly
You should extract standing water immediately to reduce absorption into flooring, framing, and finishes.
Use high-capacity pumps, wet vacuums, or truck-mounted extraction to remove bulk water fast and limit continued migration.
The sooner you clear pooled water, the less opportunity it’s got to spread and intensify structural damage.
Immediate Water Extraction
Swift water removal sets the pace for the entire drying process, because standing water keeps building materials saturated and slows evaporation.
You need an immediate emergency response with proven water extraction techniques: use truck-mounted extractors, portable wet vacs, and weighted squeegees to remove bulk water from floors, carpets, and cavities.
You’ll cut moisture load fast, which helps your drying equipment work efficiently and keeps your restoration team aligned on the same goal.
Focus on complete extraction, then check hidden pockets around baseboards, under padding, and inside low spots where water lingers.
Precise removal reduces labor time, supports accurate moisture readings, and prepares the structure for targeted drying.
When you act quickly, you protect materials, maintain momentum, and move the space toward recovery with confidence.
Stop Further Spread
Once extraction starts, stop the spread by removing standing water before it migrates into adjacent rooms, wall cavities, and subfloor seams.
You should work methodically, using pumps, extractors, and weighted wands to capture water at its source. Protect unaffected zones with containment and verify that all low points are dry.
In an emergency response, every minute matters because lingering moisture increases water contamination risk and expands demolition scope. You’ll keep the drying zone smaller, safer, and easier to control when you eliminate migration early.
Check door thresholds, baseplates, and passages for seepage, then detail extract until surfaces no longer release water.
Set Up Structural Drying Equipment
Position the structural drying equipment to create balanced airflow, temperature control, and dehumidification across the affected area.
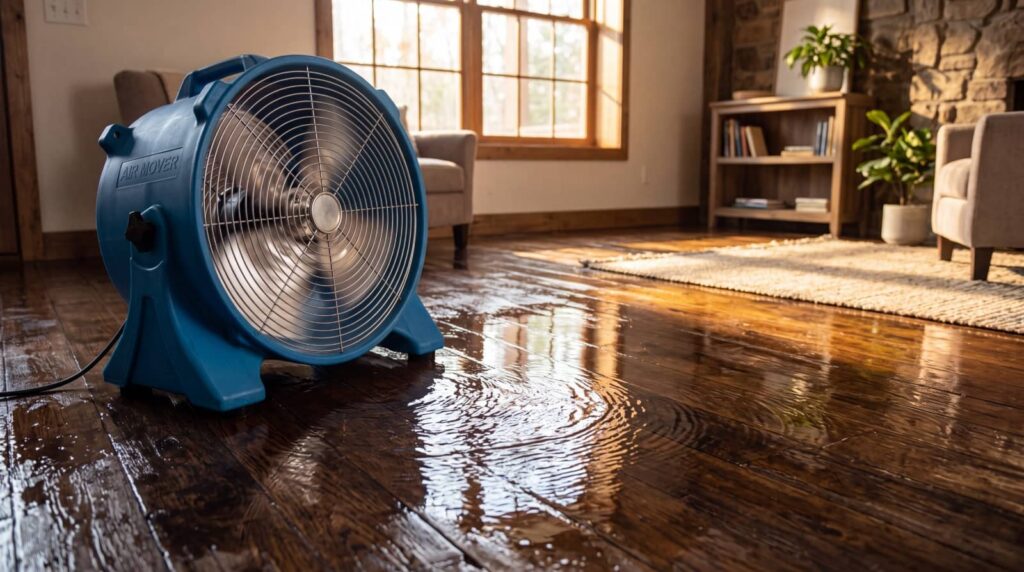
You’ll improve results by placing air movers to sweep surfaces from low to high, while keeping dehumidifiers near the wettest zones for steady moisture removal.
Make equipment selection based on material type, room size, and power availability, so you can match output to conditions without overloading circuits.
Monitor psychrometric conditions at set intervals; this helps you verify the drying duration and adjust placement when performance changes.
Keep cords clear, seal access points as needed, and label each unit so your team stays coordinated.
When you set the system correctly, you create a controlled workspace where everyone knows the plan and can work with confidence.
Dry Structural Materials Thoroughly
As the equipment runs, you should keep drying structural materials until they reach acceptable moisture levels for their specific type and thickness.
You’ll guide airflow across framing, sheathing, subfloors, and other affected assemblies so evaporation continues efficiently. Use targeted drying techniques, adjust dehumidification as conditions change, and keep each surface exposed where possible.
In shared workspaces, you help the team stay aligned by documenting progress and noting any slow-drying areas. A disciplined moisture assessment tells you whether materials still hold excess water and need more time under controlled conditions.
Don’t rush closure; incomplete drying can leave hidden damage and prolong recovery. When you stay methodical, you protect structural integrity, support the crew’s standards, and move the project toward a stable, dependable finish.
Check Moisture Levels the Right Way
Check moisture levels with a calibrated meter and a consistent testing pattern so you can verify drying progress accurately. You’ll compare readings from affected materials, adjacent areas, and known dry reference points to confirm that your drying techniques are working.
Use moisture testing at the same locations each day, document values, and note changes in temperature, airflow, and material type. This disciplined routine helps you spot uneven drying before it slows the job.
When readings plateau, adjust equipment placement or runtime, then retest to confirm improvement. By staying methodical, you keep your team aligned, reduce guesswork, and maintain confidence in the drying plan.
Accurate measurement isn’t optional; it’s how you know the structure’s returning to a stable, serviceable condition.
Prevent Mold During Drying
Prevent mold during drying by removing moisture quickly, keeping indoor humidity under control, and maintaining strong airflow across wet materials.
You should run dehumidifiers continuously, track relative humidity with calibrated meters, and adjust equipment until levels stay in the safe range.
Your mold prevention strategies work best when you sort materials by drying rate and replace saturated contents that can’t dry fast enough.
Use targeted humidity control techniques to stabilize the space, because mold can begin growing within 24 to 48 hours in damp conditions.
You’re part of a team that protects the structure and the people in it, so inspect surfaces daily and document changes.
Keep the environment clean, dry, and well ventilated to reduce contamination risk.
Dry Hidden Cavities and Wall Voids
You need to access wall voids and hidden cavities quickly so trapped moisture doesn’t remain behind finished surfaces.
Use controlled airflow through the cavities to promote uniform drying without forcing contaminants deeper into assemblies.
Verify conditions with moisture detection tools so you can confirm the voids have dried to acceptable levels.
Accessing Wall Voids
Accessing wall voids often requires opening targeted inspection points so hidden cavities can dry thoroughly after water damage. You’ll make wall cavity access at baseboards, trim lines, or discreet cutouts, then verify moisture conditions before sealing.
During this step, insulation considerations matter because saturated batts can trap water, reduce drying efficiency, and hold contaminants against framing. You should document each opening, protect finishes, and remove only what’s needed to expose wet materials.
When you work methodically, you help your team restore the structure with confidence and keep the process predictable for everyone involved. Precision here supports faster structural drying, limits hidden damage, and gives you clear control over each cavity’s condition.
After access, you can evaluate materials, isolate problem areas, and confirm that the wall is ready for the next phase.
Airflow Through Cavities
Once wall voids are open, you need controlled airflow to move moisture out of hidden cavities and into the drying airstream. Position air movers so you create directional pressure across each cavity, not random turbulence.
You’ll dry faster when air enters low and exits high, because natural convection supports cavity ventilation. Remove or slit insulation only where needed, and keep moisture barriers intact unless they’re trapping wet materials.
Seal the cavity edges enough to focus airflow, but don’t block it. Match airflow to the wall assembly, since dense materials need more time and steady velocity.
When you manage the path correctly, you protect adjacent finishes, reduce secondary damage, and keep your team aligned on a clean, efficient dry-out process.
Moisture Detection Tools
Moisture meters and thermal imaging guide cavity drying by showing where water still remains behind walls, under insulation, and inside concealed voids.
You can use moisture meters to compare wet and dry readings, track progress, and verify when materials return to acceptable levels.
Thermal imaging helps you spot temperature anomalies that often signal trapped moisture in wall voids, ceilings, and subfloors.
When you combine both tools, you reduce guesswork and target drying equipment where it’s needed most.
That precision helps you protect structural materials, limit hidden damage, and keep your drying plan on schedule.
You’re not working alone here; these tools give your team clear, shared data so everyone can act with confidence and stay aligned on the same restoration goal.
Know When Repairs Can Begin
Before you start rebuilding, confirm that all affected materials have reached safe moisture levels and that hidden cavities, framing, and subfloors have been fully dried.
You should base repair timing on documented initial assessments, not on visible surface dryness alone. Check readings against baseline targets for wood, drywall, and concrete, and verify that temperatures and airflow have stabilized.
When the structure stays within acceptable ranges across multiple measurements, you can move forward with confidence. At that point, you and your contractor can sequence repairs efficiently, protect adjacent areas, and reduce the chance of trapped moisture.
This step helps you join the project’s recovery plan with clear expectations, so the finished work performs as designed. Keep your records, and don’t begin finish work until every critical assembly passes inspection.
Avoid Common Structural Drying Mistakes
Even after readings fall within target ranges, drying errors can still delay repairs and leave hidden damage behind.
In structural drying, you need to avoid common mistakes that compromise safety and schedule. You’re part of a team that can prevent rework by verifying materials, airflow, and hidden cavities before release.
Don’t rely on surface readings alone; inspect wall bases, subfloors, and insulation for trapped moisture.
Keep equipment placement balanced so you don’t short-circuit airflow or miss isolated wet zones.
Document progress daily; you’ll catch plateaus early and adjust dehumidification before mold risk rises.
When you follow these controls, you protect the building, support your crew, and keep recovery on track.
Precision matters, and your diligence helps everyone move forward with confidence.
Frequently Asked Questions
How Much Does Fast Structural Drying Usually Cost?
Usually, you’ll pay $1,000–$5,000, depending on cost factors like affected area, severity, and drying methods used. You deserve a team that acts fast, protects your property, and keeps you informed throughout.
Can I Stay in My Home During Structural Drying?
You can stay, if safety precautions and drying equipment allow it, but you’ll need to avoid treated areas, manage noise, and follow technicians’ directions. Your comfort matters, yet your health and home’s integrity come first.
Will Insurance Cover Professional Water Damage Drying Services?
Often, yes—your insurance may cover professional water damage drying services if the loss is sudden and covered. You should review your policy, document damage, and file insurance claims promptly to maximize reimbursement and speed restoration.
How Long Should Furniture Stay Out of the Drying Area?
Keep furniture out until the drying duration ends and you verify furniture safety. Measure moisture levels, then return items only when materials read normal. A stitch in time saves nine, and you’ll avoid hidden damage.
Do I Need to Replace Drywall After Every Water Damage Event?
No, you don’t need to replace drywall after every water damage event; you should perform a moisture assessment first. If drywall dries within safe limits, drywall restoration can save it, while contaminated or swollen sections need replacement.
Wrap-Up
Fast structural drying after water damage helps you stop deterioration before it spreads. You can’t afford delays: in as little as 24 to 48 hours, mold growth can begin on wet materials, turning a manageable loss into a larger remediation project. By extracting water quickly, placing dehumidifiers and air movers correctly, and tracking moisture levels, you’ll dry structural materials thoroughly, protect hidden cavities, and know when repairs can safely begin.