
A damp wall can turn a quiet room into a hidden problem fast. You need to stop the water, inspect for early mold, and dry affected materials within 24 hours. If drywall, carpet, or insulation stays soaked, remove it safely and clean nearby surfaces thoroughly. When mold reaches wall cavities or spreads beyond a small area, you may need professional containment and mold remediation—and the next step matters more than you think.
Key Takeaways
- Stop the water source immediately, remove standing water, and dry the area within 24 hours to reduce mold growth.
- Inspect for mold using musty odors, discoloration, bubbling paint, and hidden damp areas behind furniture or in corners.
- Remove and discard porous materials like soaked drywall and carpet, then clean hard surfaces with detergent and disinfectant.
- Wear gloves, goggles, and an N95 respirator, and contain contaminated areas to avoid spreading spores during cleanup.
- Fix leaks, control humidity below 60 percent, and call certified professionals for extensive mold or hidden moisture problems.
Stop Water Damage Fast
The first 24 hours matter most: if you stop water intrusion quickly, you can greatly reduce the risk of mold growth.
You should act with an emergency response mindset: shut off the source, cut power if water’s near outlets, and move valuables out of the wet zone.
Use towels, a wet vac, or a pump to remove standing water, then open drains and windows if conditions allow.
For water damage prevention, dry affected surfaces fast and keep air moving with fans and dehumidifiers.
Don’t wait for damage to spread; every minute counts.
If you’re unsure where moisture is hiding, call a qualified restoration team.
You’re not handling this alone, and quick, organized action helps protect your home, your health, and your peace of mind.
Spot Mold Early
Look closely for early warning signs so you can catch mold before it spreads: musty odors, discoloration on drywall or baseboards, bubbling paint, peeling wallpaper, and dark spotting around leaks, windows, or HVAC vents.
Use simple mold detection techniques: inspect damp corners with a flashlight, check hidden edges behind furniture, and note any recurring staining after storms or plumbing issues.
If you see fuzzy growth, treat it as urgent and document the area with photos. You’re not alone in this process; many homeowners miss the first clues.
Trust your senses, stay systematic, and compare suspicious spots across rooms. Quick identification helps you act before damage worsens and keeps your home safer for everyone inside.
Dry Out Water-Damaged Materials
You should remove moisture as quickly as possible, since standing water and damp surfaces let mold start growing fast.
Next, sort materials by what you can salvage and what you need to discard, so you can focus drying efforts where they’ll help most.
Use fans, dehumidifiers, and good airflow to dry the remaining materials thoroughly and keep humidity under control.
Remove Moisture Quickly
Within the first 24 to 48 hours, remove standing water and dry affected materials as fast as possible to slow mold growth and limit structural damage.
You should run dehumidifiers, fans, and HVAC airflow continuously, but don’t trap dampness behind moisture barriers unless they’re part of a controlled drying plan.
Check hidden spaces under baseboards, inside wall cavities, and beneath flooring, because lingering moisture can keep mold active.
Use humidity control to keep indoor levels low and stable while you work.
Wipe hard surfaces, elevate items off wet floors, and open pathways for air movement.
If you act quickly and stay consistent, you’re protecting your space and helping everyone in the home recover together.
Sort Salvageable Materials
As the area dries, sort materials by what can be cleaned, dried, or must be discarded so you don’t waste time on items that can’t be saved.
Use clear salvage criteria: nonporous items like metal or plastic often recover well, while swollen drywall, insulation, and heavily contaminated carpet usually don’t.
During material assessment, check for structural integrity, staining, odor, and delamination.
Set aside items with only minor surface contamination for cleaning, and group questionable materials separately for a second review.
Keep your team’s workflow organized with labeled piles or bins so everyone knows what belongs where.
This approach reduces confusion, limits handling, and helps you focus on the materials most likely to return safely to service.
Use Drying Equipment
Deploy drying equipment promptly to halt mold growth and pull moisture out of salvageable materials. You’ll protect your home faster when you combine airflow, heat, and controlled humidity.
Choose drying equipment types that fit the space: air movers for surface evaporation, dehumidifiers for deep moisture removal, and HEPA filtration if dust is present. The dehumidifier benefits are clear: it lowers relative humidity, speeds drying, and reduces the chance that hidden dampness feeds mold.
- Position units to create cross-ventilation.
- Check moisture levels in walls, floors, and framing.
- Run equipment continuously until readings normalize.
Stay consistent, and you’ll help your space recover safely. You’re not handling this alone; a disciplined drying plan gives your team the best shot at restoring materials before damage spreads further.
Safely Remove Mold-Contaminated Materials
Before you remove anything, protect yourself and contain the area so mold spores don’t spread to cleaner rooms. Wear gloves, goggles, and an N95 respirator, then seal doorways with plastic sheeting.
Use mold removal techniques that match the material: discard porous items like soaked drywall, insulation, carpet, and ceiling tiles when they’re visibly colonized or have stayed wet too long. Cut them into manageable sections, bag them double, and close the bags before carrying them out.
Keep your safety precautions consistent by avoiding dry sweeping or aggressive handling that can aerosolize spores. Label contaminated waste and move it directly outside through the shortest route.
Work with a partner when possible; you’ll stay safer, organized, and part of a team that gets the space ready for the next step.
Clean and Disinfect Moldy Surfaces
Once you’ve removed unsalvageable materials, clean the remaining hard surfaces with detergent and water to lift mold residue, then dry them thoroughly so moisture doesn’t fuel regrowth.
You’re using proven mold cleaning techniques that protect your space and help your home feel like yours again. After washing, apply disinfectant solutions labeled for nonporous surfaces, following the contact time exactly so they work as intended.
- Wear gloves, eye protection, and an N95 respirator.
- Use clean cloths; change them when they’re dirty.
- Dispose of waste promptly in sealed bags.
Keep the area ventilated, and don’t mix chemicals.
If staining remains, that doesn’t always mean active mold. What matters most is a clean, fully dried surface you can trust.
Check Wall Cavities for Hidden Mold
You should watch for hidden mold signs like a musty odor, staining, or warped drywall near the damaged area.
If you suspect growth inside the wall, you’ll need to open select wall cavities to inspect insulation, framing, and backing materials.
Use moisture testing methods, such as a pin or pinless meter, to confirm where dampness remains so you can target remediation safely and efficiently.
Signs Of Hidden Mold
Hidden mold often hides inside wall cavities after water damage, where trapped moisture can feed growth long after the surface looks dry.
You can spot subtle clues with mold identification techniques that focus on patterns, odors, and material changes. Stay alert for these signs:
- A musty, earthy smell that lingers in one room
- Stains, bubbling paint, or warped drywall near the damaged area
- Worsening allergies, headaches, or other health risks when you’re indoors
If you notice these indicators, trust your observations and act quickly.
Hidden mold rarely improves on its own, and early detection helps protect your home and your people.
You’re not overreacting—you’re taking a practical step that keeps your space safer and supports everyone who lives there.
Opening Wall Cavities
When mold signs point to moisture inside a wall, carefully opening the cavity lets you confirm what’s happening behind the surface and plan the right fix.
You should remove trim, drywall, or paneling in a controlled way so you can inspect the wall structure without causing extra damage. Look for stained sheathing, softened framing, and damp insulation, because insulation impact can trap moisture and spread odors.
If you work methodically, you’ll protect surrounding rooms and help your team feel confident about the next step. Keep cut lines neat, label materials as you go, and set aside salvageable pieces.
This approach helps you understand the full extent of hidden mold while keeping the repair process organized, safe, and supportive for everyone involved.
Moisture Testing Methods
After you’ve opened the wall cavity, moisture testing confirms whether the area is still wet and where water may be trapped. You can trust this step to guide safe cleanup and help your team spot hidden mold before it spreads.
Use tools that read moisture accurately and verify drying progress:
- Moisture meters help you compare affected framing, sheathing, and insulation against dry material.
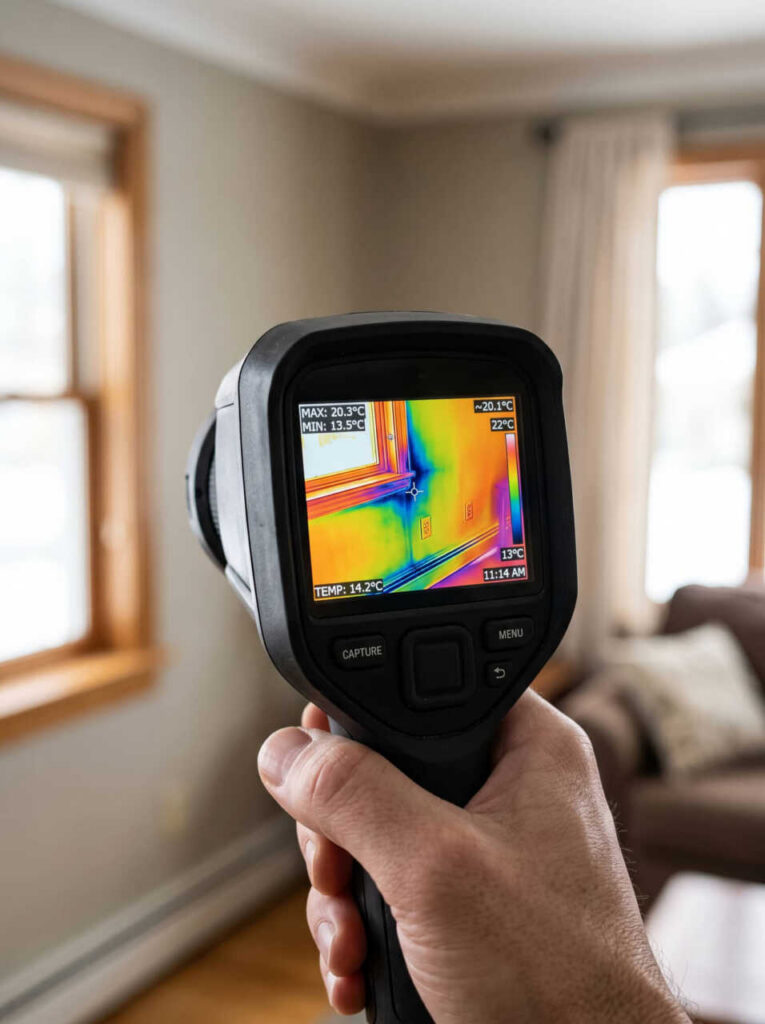
- Thermal imaging reveals cool, damp zones that may still hold water behind surfaces.
- Combine readings with visual checks so you don’t miss seepage at seams, fasteners, or corners.
When you test methodically, you protect your home and make smart remediation decisions. You’re not guessing—you’re confirming conditions, documenting results, and moving forward with confidence as a group focused on getting the wall dry.
Fix Leaks and Humidity Sources
Stop mold at the source by repairing leaks and controlling moisture inputs before you clean or seal anything.
Start with leak detection around roofs, windows, supply lines, drains, and appliance connections. Tighten fittings, replace worn washers, and seal cracks so water can’t keep feeding growth.
Then focus on humidity control: run bath and kitchen fans, vent dryers outdoors, and keep indoor relative humidity near 30% to 60%.
If your home has a damp basement or crawlspace, use a dehumidifier and check condensate drains. Insulate cold pipes to prevent sweating, and fix grading or gutter problems that push water toward the structure.
When you stop hidden moisture, you protect the space you share and make the rest of remediation work far more effective.
Call Mold Remediation Pros
If mold has spread beyond a small, surface-level area, you should call a certified mold remediation pro to assess the damage and contain it safely.
You’ll get a clear mold inspection, accurate moisture mapping, and a professional assessment of hidden growth behind walls, under flooring, or in HVAC paths. That expertise matters because you deserve a team that works methodically and treats your space with care.
- Identify the source and extent of contamination
- Set up containment to limit spore movement
- Remove affected materials and verify cleanup
You don’t have to guess what’s safe or effective. A qualified crew can explain findings, answer your questions, and guide you through each step.
With the right help, you can move forward confidently, knowing your home’s recovery is in capable hands.
Prevent Mold After Future Leaks
Once the existing mold problem is under control, you can lower the chance of it coming back by acting fast on every new leak and drying wet materials within 24 to 48 hours.
Inspect plumbing, roofs, windows, and appliance hoses regularly, and keep a written checklist so your household stays on the same page.
Install leak sensors near sinks, water heaters, and washing machines to catch problems early.
Use dehumidifiers and exhaust fans to support humidity control, especially in bathrooms, basements, and laundry rooms.
Keep indoor moisture below 60 percent, and improve ventilation where condensation forms.
Replace soaked drywall, insulation, and carpet padding when needed.
These preventive measures help you protect your home, reduce cleanup stress, and feel confident that your space stays healthy for everyone who lives there.
Frequently Asked Questions
How Long Can Mold Stay Hidden After a Leak?
Hidden mold can stay concealed for months or years after a leak if you don’t catch it. You should use leak detection fast, inspect damp areas, and act early so you’re protecting your home and community.
What Health Symptoms Suggest Mold Exposure?
You may notice sneezing, coughing, watery eyes, headaches, or a throat that feels like a furnace. These signs can reflect mold allergies or respiratory issues, so you should check your space, act quickly, and stay reassured.
Does Insurance Usually Cover Mold Remediation Costs?
Usually, you’ll get partial coverage, not full payment. Check your policy exclusions and coverage limits, then file promptly. If the damage stems from a covered event, you’ve got a stronger chance of reimbursement.
Can I Use Bleach on Porous Materials?
No, you shouldn’t use bleach on porous materials; bleach effectiveness is limited, and porous material risks include deep contamination. You’re not stuck—remove and replace damaged items, then dry and clean nearby surfaces thoroughly.
When Should I Test Indoor Air for Mold?
You should test indoor air for mold when you smell persistent mustiness, see visible growth, or notice unexplained symptoms. Mold testing helps assess air quality, and you’ll feel more confident with prompt, professional evaluation.
Review
So, you’ve learned the glamorous truth of mold remediation after water damage: act fast, dry everything, and don’t let a soggy wall become a science experiment. Check hidden spaces, remove contaminated materials, and clean surfaces like you mean it. Fix leaks, tame humidity, and call pros when the mess outgrows your weekend bravery. Do that, and you’ll keep mold from turning your home into a damp, sneaky tenant that never pays rent.